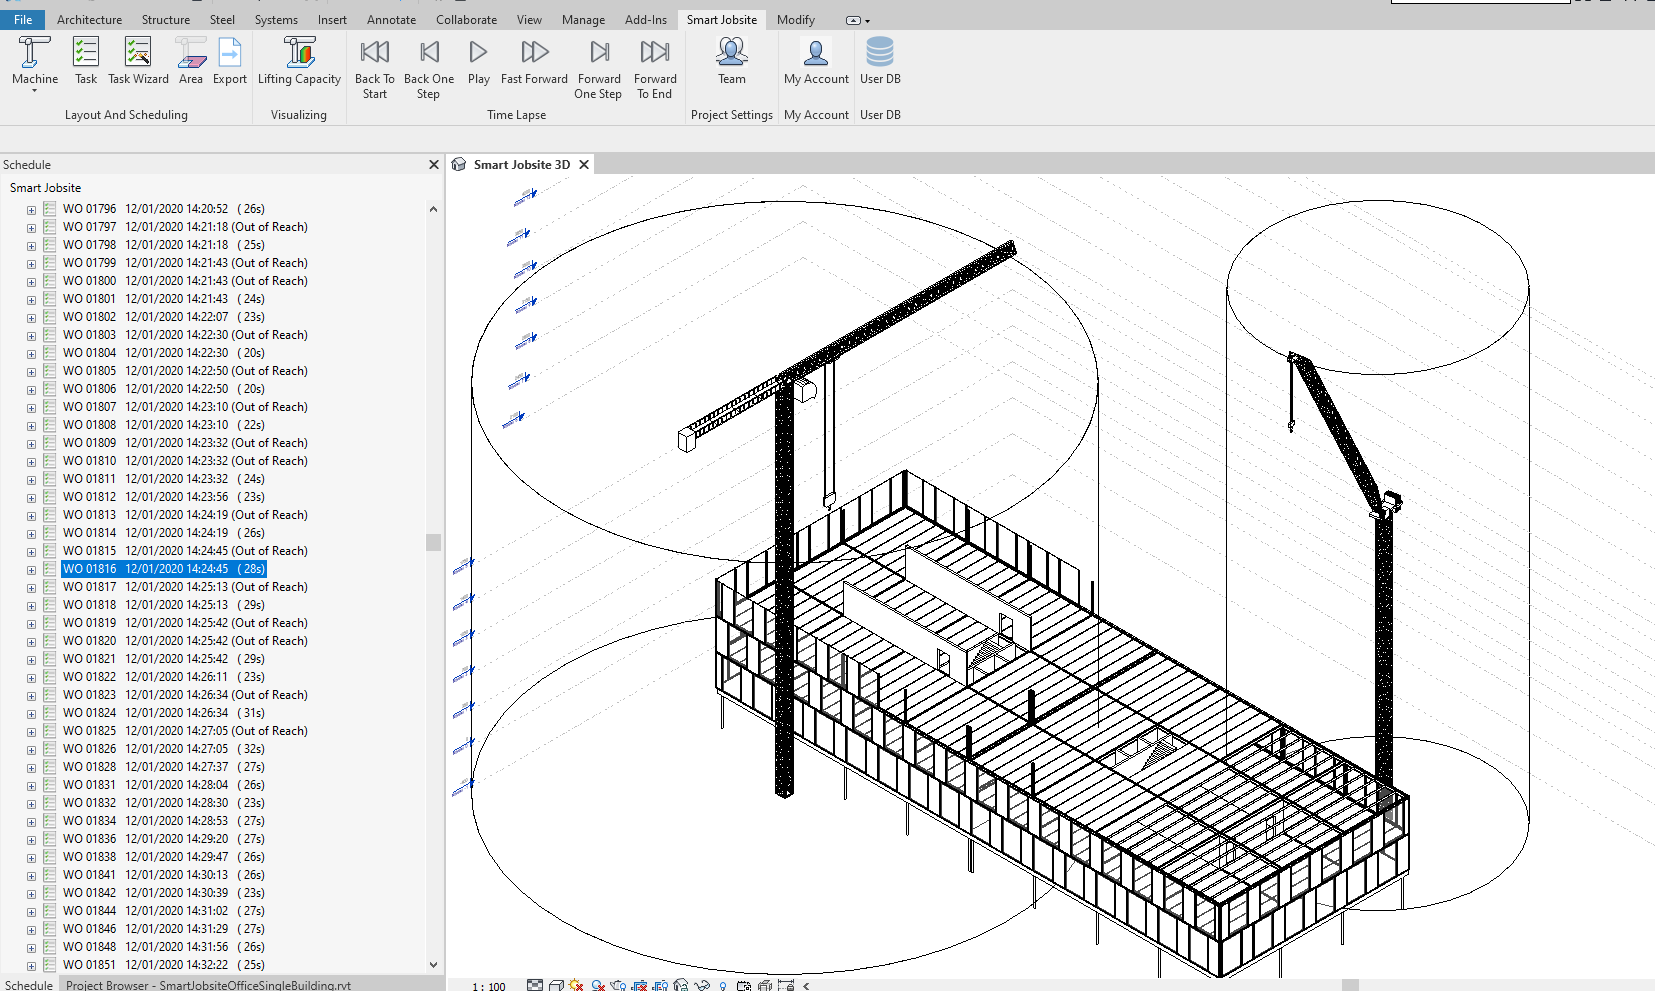
Layout and scheduling
Machine
How to manage machines with Smart Jobsite For Revit?
-
Create a crane

On the Smart Jobsite Tab click on the "Machine" drop down

You can choose between 4 types of machines, Flat crane, Luffing crane, mobile crane and Crawler crane
If you click on a crane type you will acces the following panel
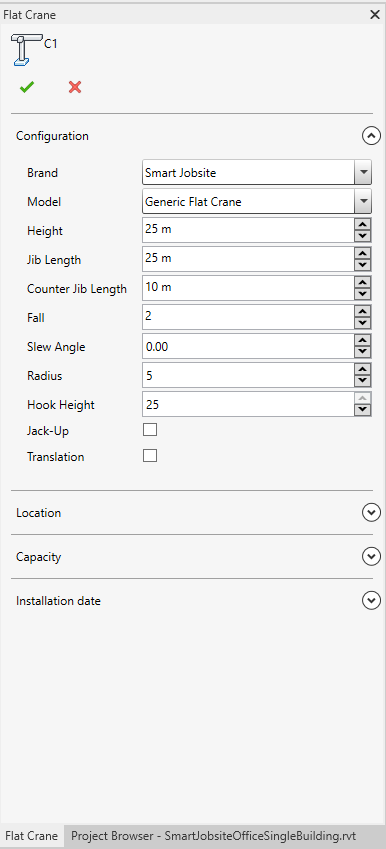
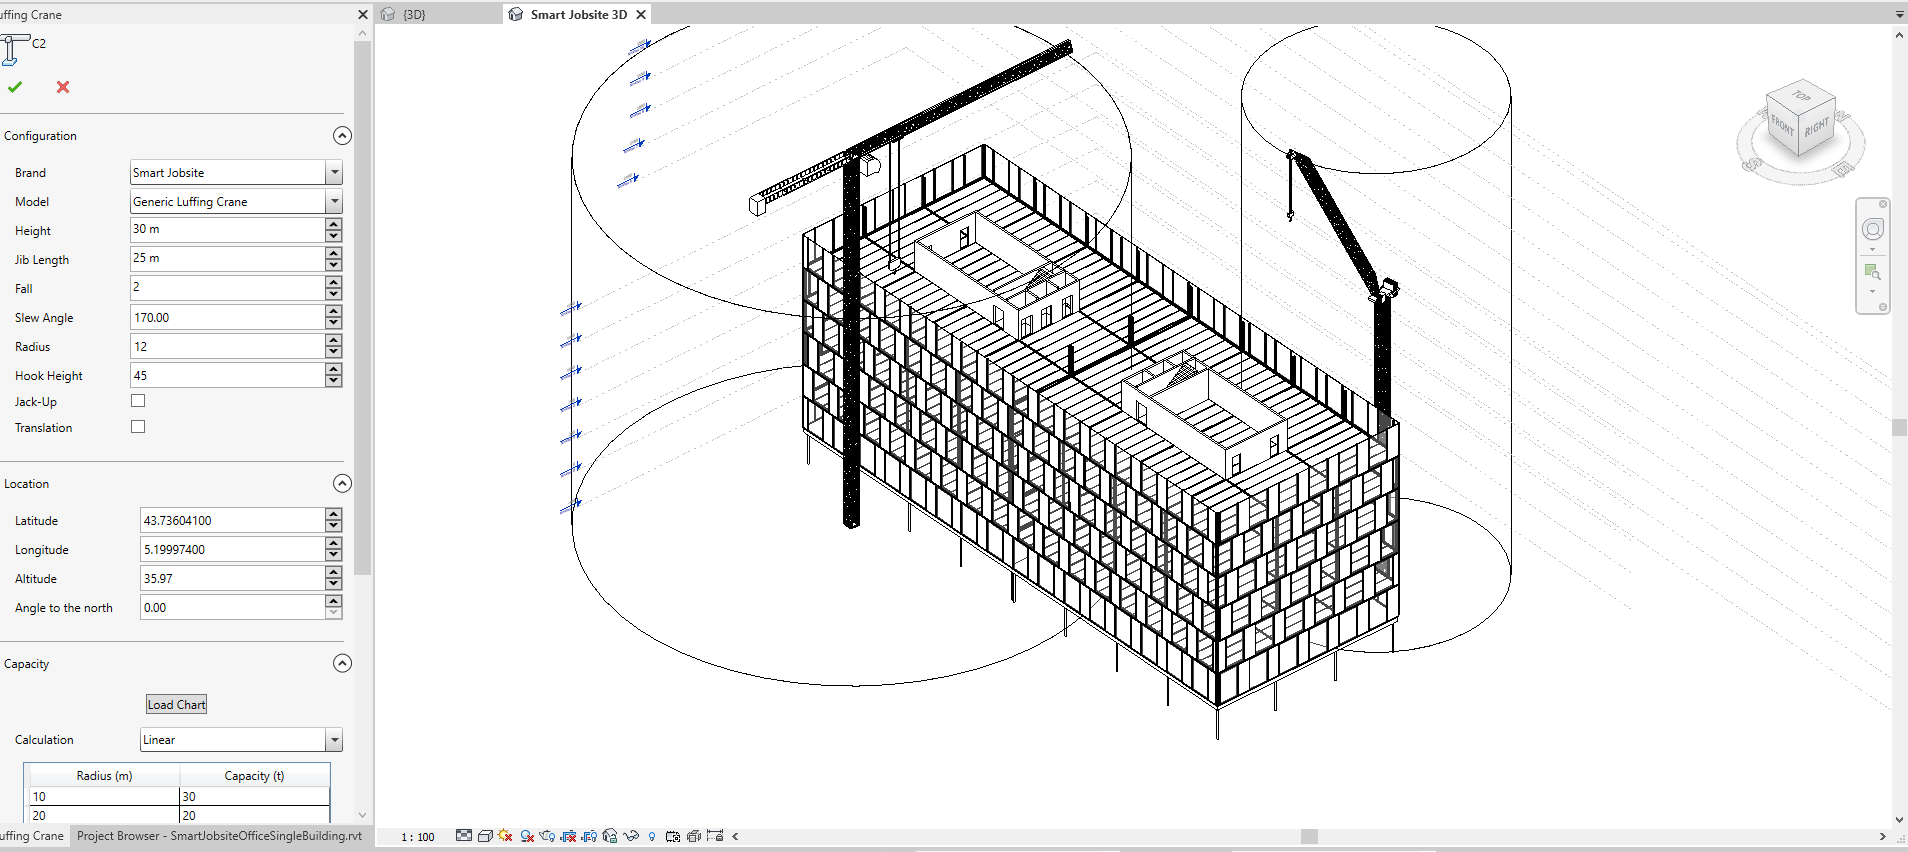
Under configuration you can manage :
- The Brand and Model of the crane, you have acces to a huge database of cranes.
- The crane geometry : height, length, counter jib length, number of fall
- The crane position : slew angle, radius, hook height.
The configurations changes will be visible on the 3D view
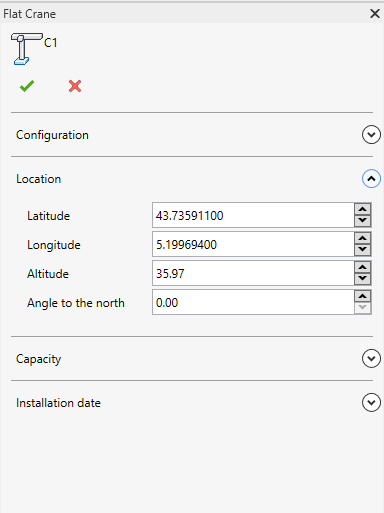
Under Location you can change the location of you crane using GPS coordinates. You will see the changes on the 3D view
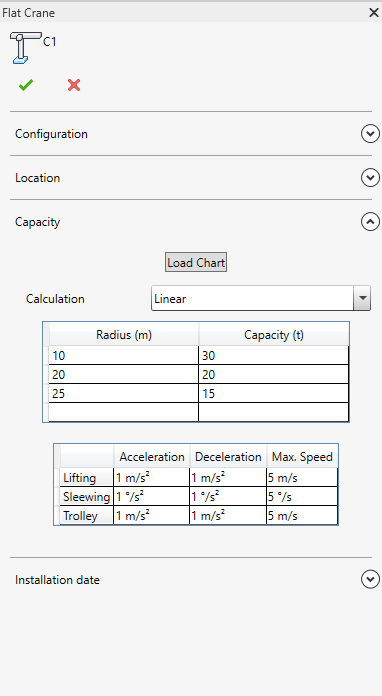
Under Capacity you can manage your load chart.
If you click on the "Load Chart" button you will have acces to the load chart have the crane you choose on the configuration part (Brand and model ).

Thanks to this you can enter the right value on the load chart table

You can change the calculation method.
If you choose Linear we will consider that the weight is linear between two points
If you choose step we will consider that the capacity change every step you defined on the table
The load chart data will be used to calculate the lifting capacity
Under Installation date you can manage the installation date of you crane
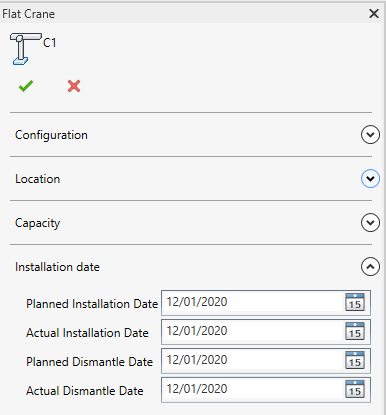
The dates you setup will be use to define the schedule
You can add as many cranes as you want and try different jobsite configuration
Task
How to create a task with Smart Jobsite For Revit
Under the Smart Jobsite tab you can click on the task button to create a task
You will have acces to the following panel
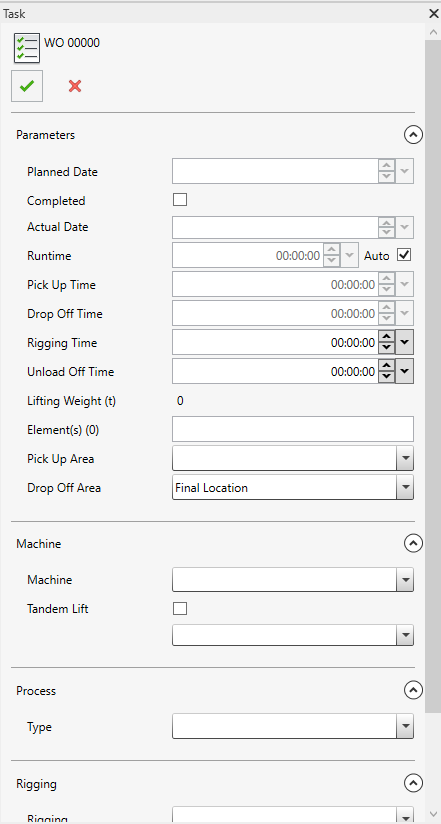
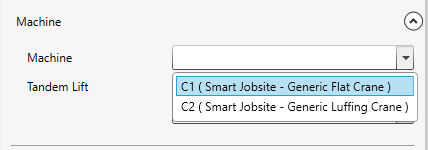
You first need to select a machine
Then you can setup the parameters
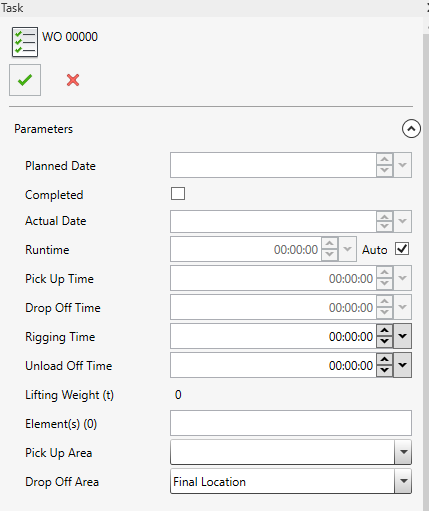
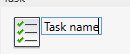
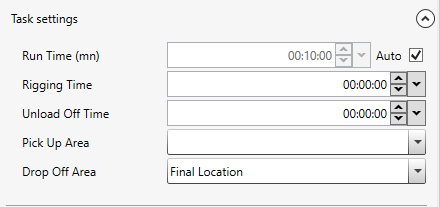
You can change the task name by click on the name
- Planned date : the planned date is calculated automatically. You can't edit it.
- Completed : you can check/unckeck it to define if the task is completed or not
- Actual date : The actual date can be changed only if the task is completed
- Runtime : if the auto claculation is checked, the runtime is calculated automatically so you cant change it. If the auto is uncheck you can define a runtime
- Auto runtime : if you enable the auto runtime calculation wsmart jobsite for revit will automatically calculate standard runtime
- Pick up time : time to pick up the load. It's automatically calculated if the auto runtime is checked.
- Drop off time : time to drop off the load. It's automatically calculated if the auto runtime is checked.
- Rigging time : time fr the rigging.
- Unload time : time to unload.
- Lifting weight : sum of the elments weight in the task.
- Elements : list of the elments of the task. You can click on element in the 3D to add/remove it to the task

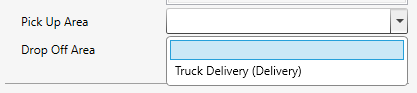
- Pickup area : you can leave blank or choose a pickup area for the task

- Drop off area : you can choose a drop off area or the final location. The final locaiton means that the element is install at his final location on the building

Under Process :
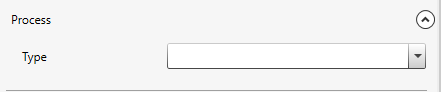
you can choose between different process types :
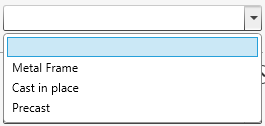
If you choose Cast in place you will have more settings :
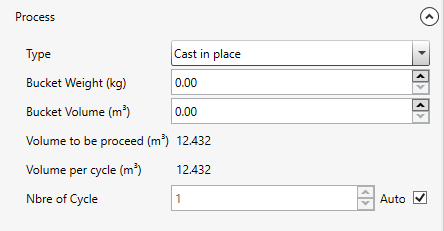
- Bucket weight : weight of the concrete bucket
- Bucket volume : volume of the conrete bucket
- Nbre of cyle : you can choose auto so the numbe rof cycle will be automatically calculated, or you can setup the wanted number of cycles
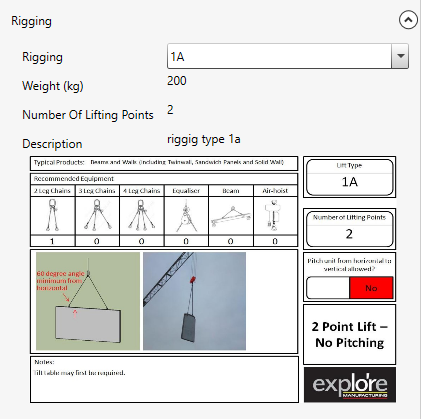
Under Rigging you can choose the rigging type. Rigging types can be created on the user database section
Once the task is fully setup you can click on  to validate it. The created task will be on you schedule
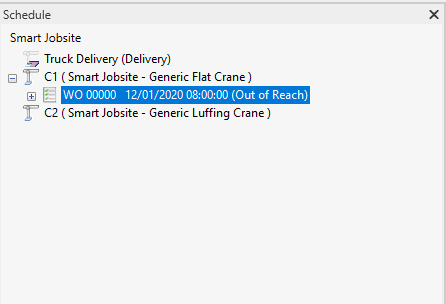
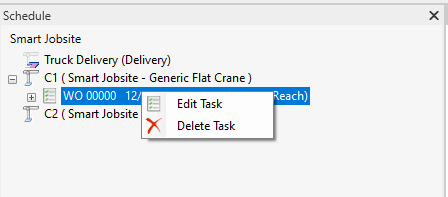
You can edit or delete the task by right click on it
Task wizard
How to use the task wizard with Smart Jobsite For Revit
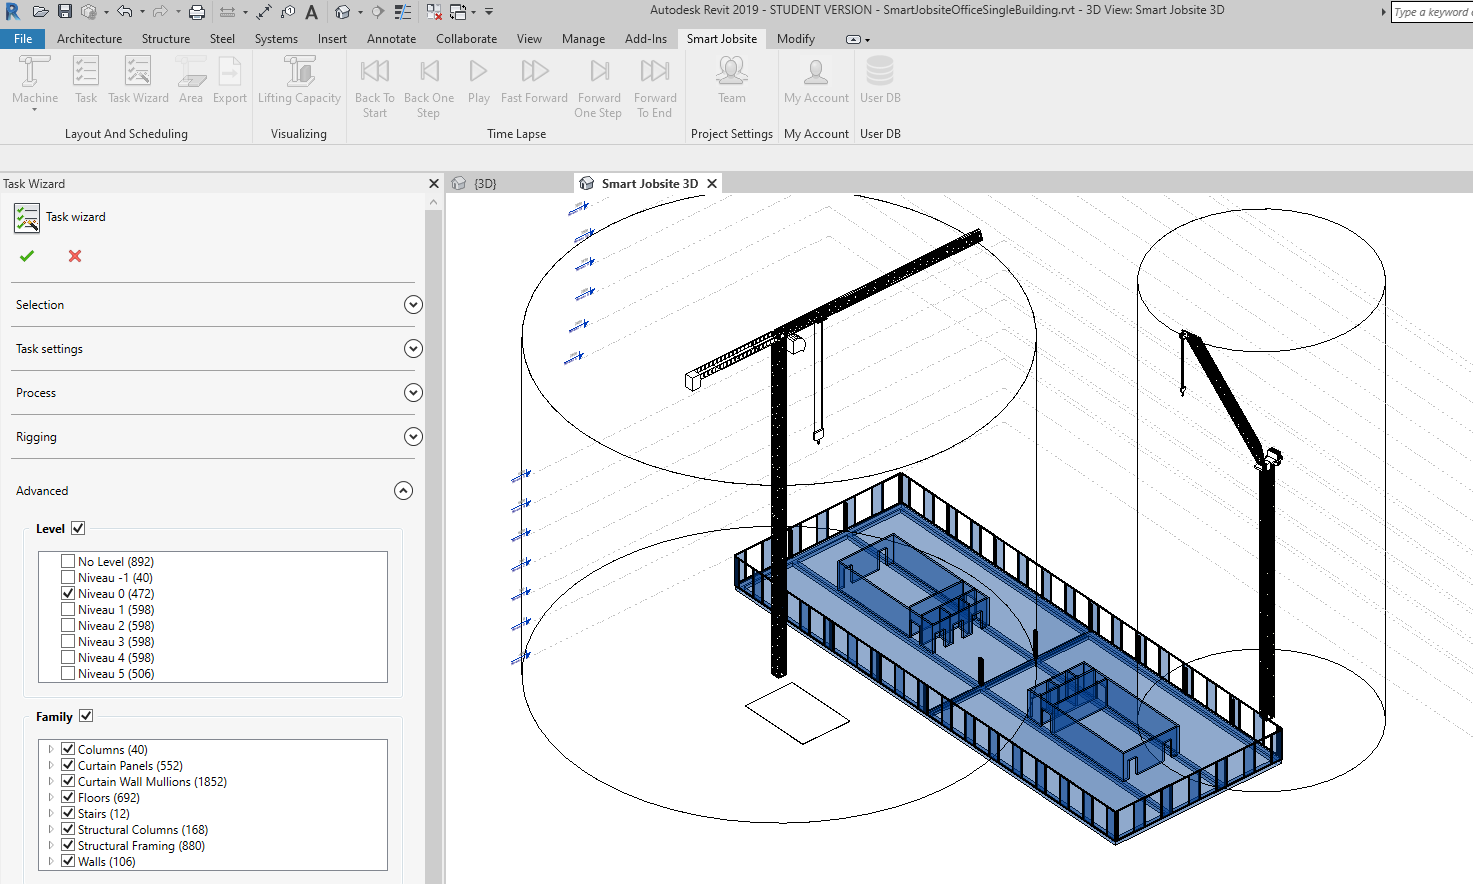
The task wizard can be used to create multiple tasks at the same time. You will have acces to several filters like level or family. The best pratices are to use the filter to create task as the building will be build
Under the Smart Jobsite tab you can click on the "Task Wizard" button
You will have acces to the following panel
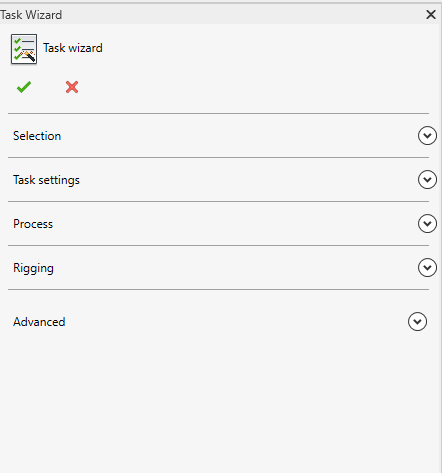
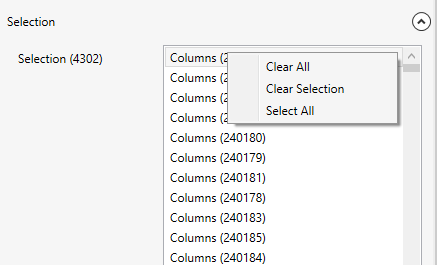
Under selection :
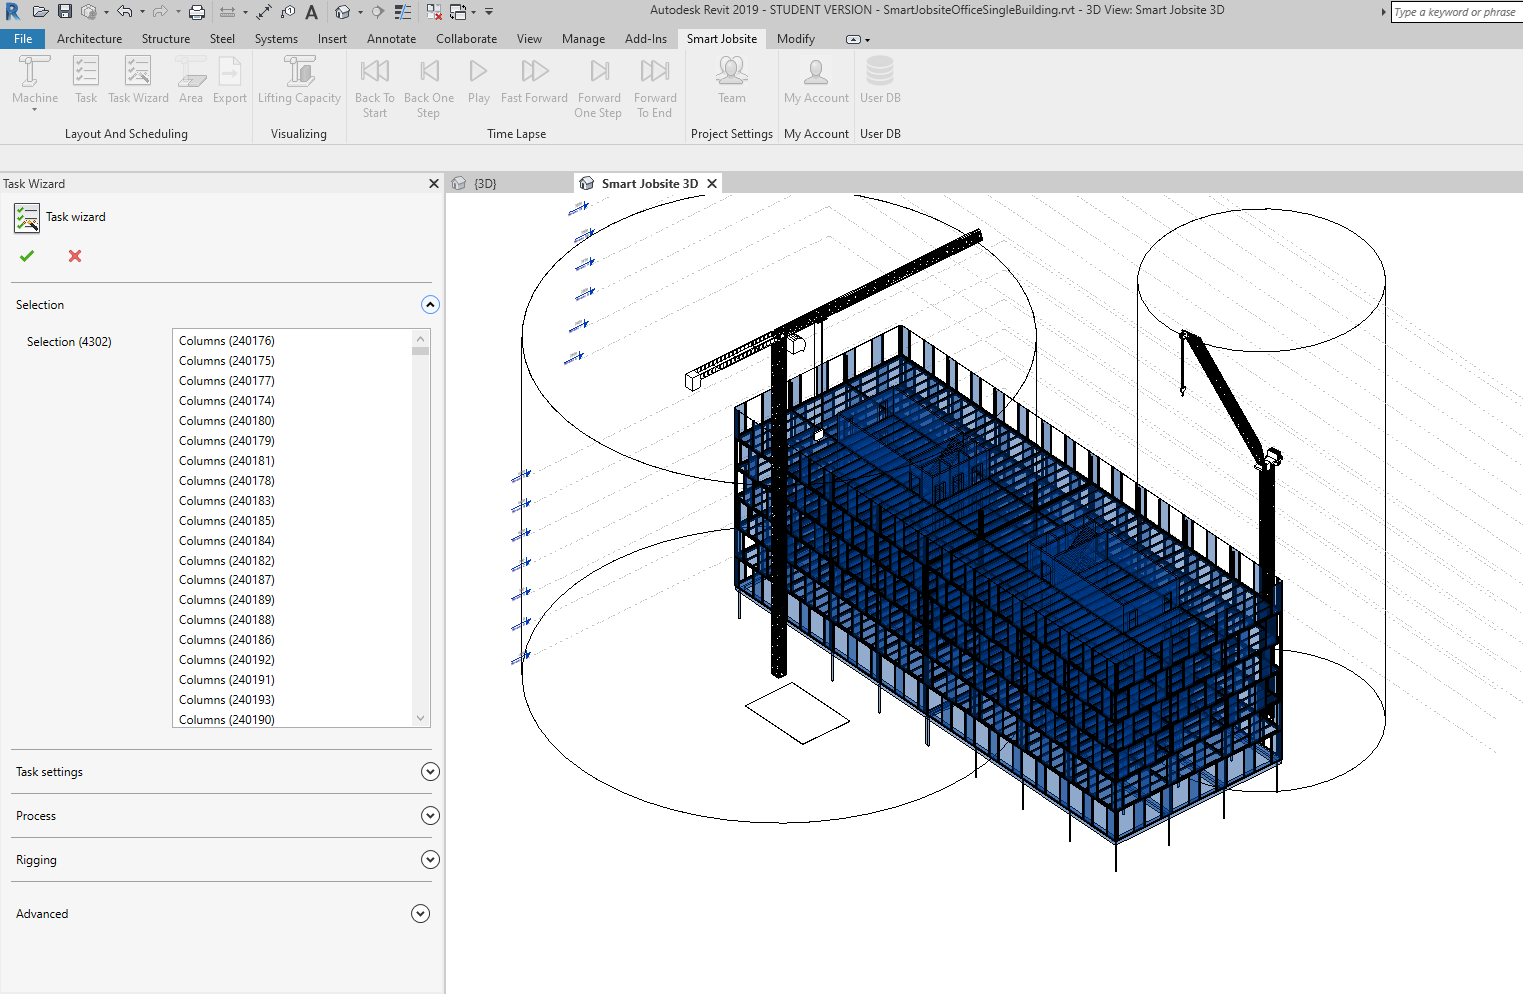
You will see the list of the selected elements. The task wizard will create a task by selected element.
You can right click on the selection to remove elements
Under task settings :
You can manage the settings of the tasks you will create. For more informations about the settings you can go to the Task documentation (click here to go to the documentation).
Under rigging :

You can manage the rigging type of the tasks you will create. For more informations about the rigging type you can go to the Task documentation (click here to go to the documentation).
Under Advanced :

You will be able to use several filter
- Level : By checking level you will be able to filter the visible elements by level
- Family : By checking family you will be able to filter the visible elements by family
- Only unassigned elements : By checking/unchecking this option you will be able to hide/unhide the elements that has already been assigned to a task.
One everything is setup you can validate by clicking on 
You will see the created tasks on your schedule

Area
How to create areas with Smart Jobsite For Revit
Areas such as Delivery, Storage or Pickup can be created and manage thanks to Smart Jobsite. When you create task you can define the areas for the beginning and the end of the task. Smart Jobsite will then calculate the task time.
To create an are Smart Jobsite will use a floor. Once a floor is defined as an area for Smart Jobsite it will not take into account anymore as an element to lift
To create a floor you can use the Revit tools under Architecture/floor
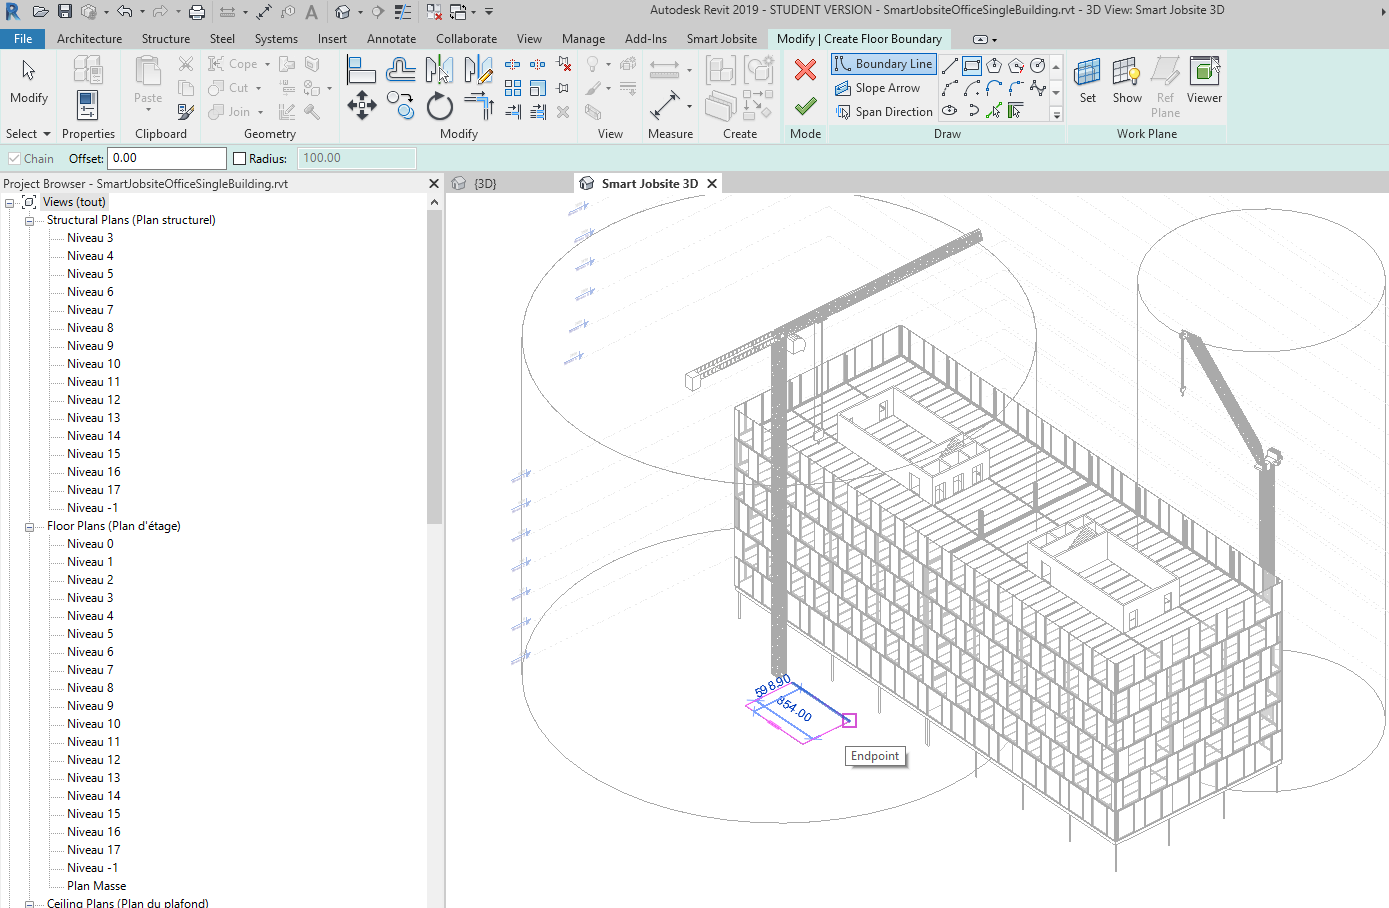
you can draw your floor and validate
Then under the Smart Jobsite tab you can click on the Area button to create an Area
You will have acces to the following panel
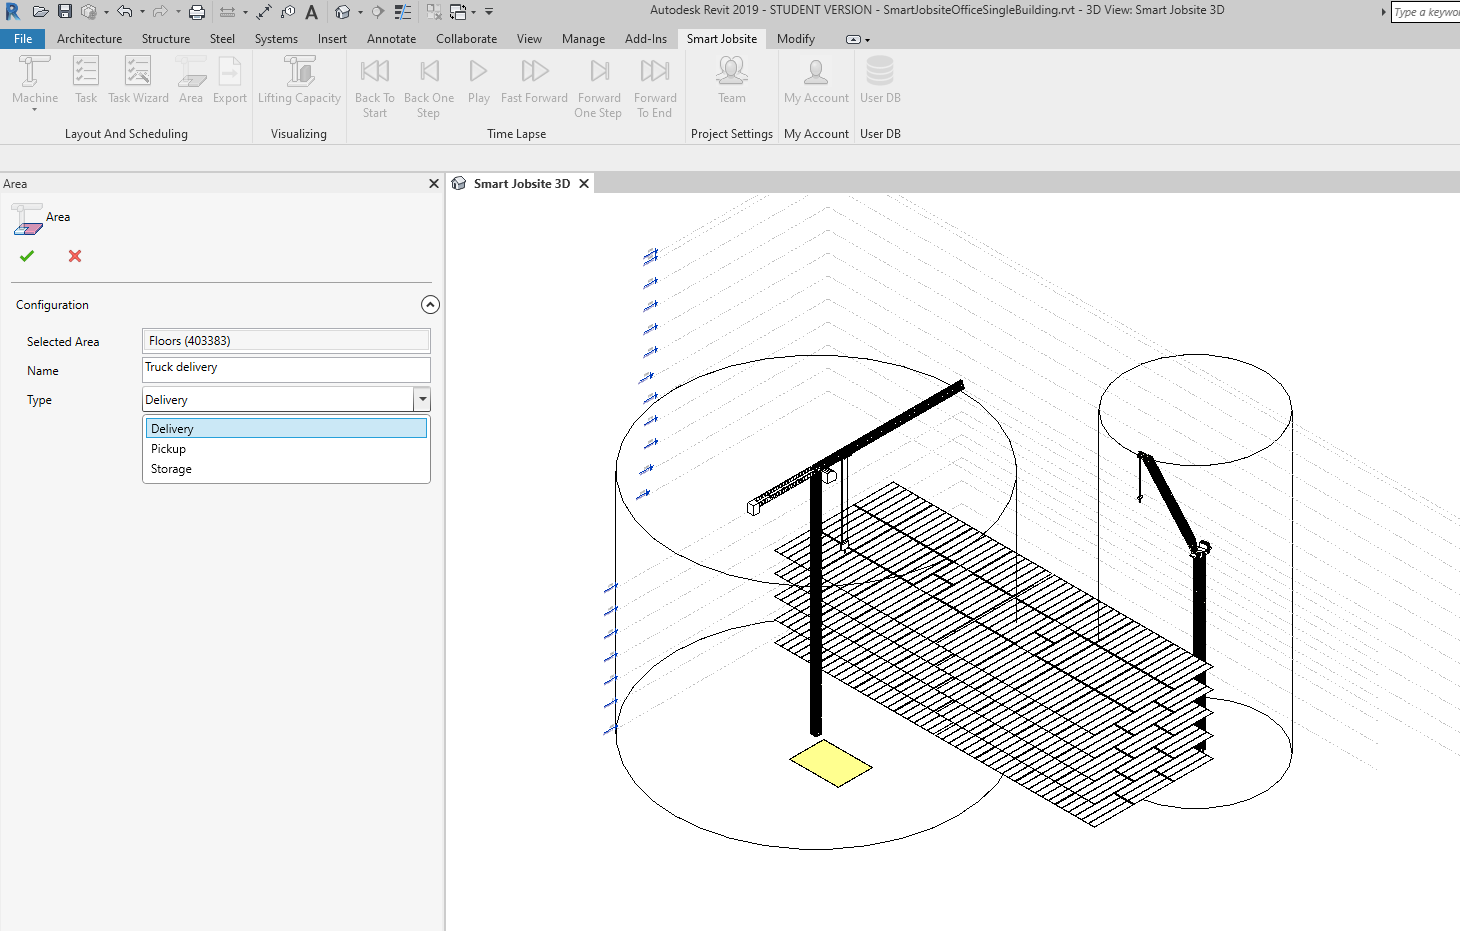
- Selected Area : you can click on a floor on the 3D to select an area
- Name : name of the area
- Type : Type of the area
Then you can validate with 
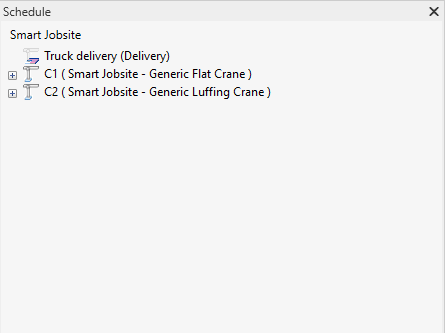
You wil see the created area on your schedule
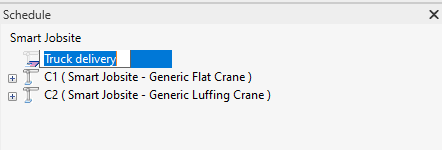
You can change the name of the area by clicking on it
Or right click on it to edit /delete the area

Export
How to export a lifting plan with Smart Jobsite For Revit
Under the Smart Jobsite tab you can click on the export button
You will have acces to the following panel
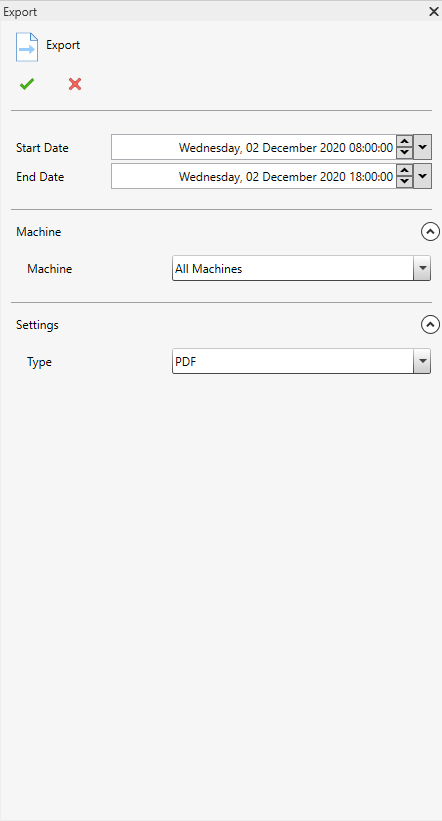
- Start date ; start date of the export
- End date : end date of the export
- Machine : the machine you want to export the lifting plan, you an choose one or all machines
- Type : the export format, pdf, csv or html
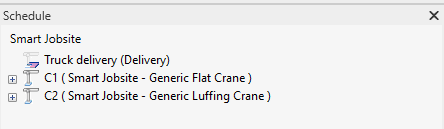
Schedule
How to use the Schedule on smart Jobsite For Revit
The schecule will allow you to manage you lifting plan. You can manage everything from this treeview : project, cranes,area, tasks, elemets. to edit something you can right click on it
On the schedule you can expand cranes to see tasks and tasks to see elements
The schecule date will be automatically calculated with the data you setup such has crane installation date, load chart, cranes engines properties, ...
On the schedule you can see if some tasks areover capacity or not reachable
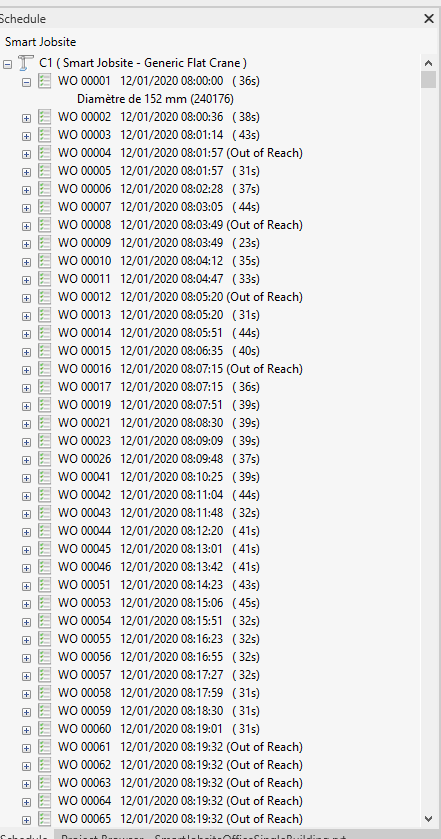
You can use drag and drop to manage you lifting plan
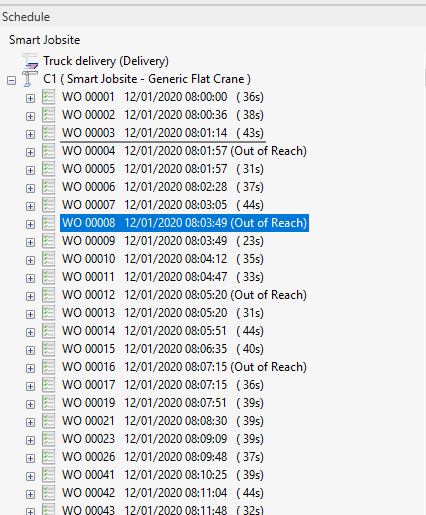
You can see the buildingprogress by clicking on a task