Smart Jobsite for Revit
- Installation
- Smart Jobsite account : Login / Signup / Reset password
- Create a Smart Jobsite account from the Revit Add-on
- Log in to the Smart Jobsite For Revit Add-on
- Reset your Smart Jobsite password from the Revit Add-on
- General project setup : Best praticies
- Layout and scheduling
- Visualizing
- Time lapse
- Project settings
- User Data Base
Installation
Installation
How to install Smart Jobsite For Revit?
To install the Smart Jobsite For revit Add-on you need to excecute the msi as explained bellow
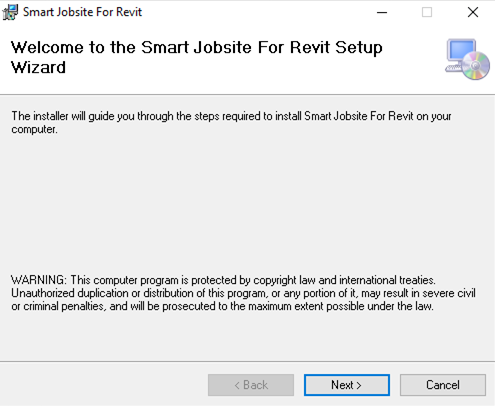
Launch the Smart Jobsite For Revit.msi
Click on next
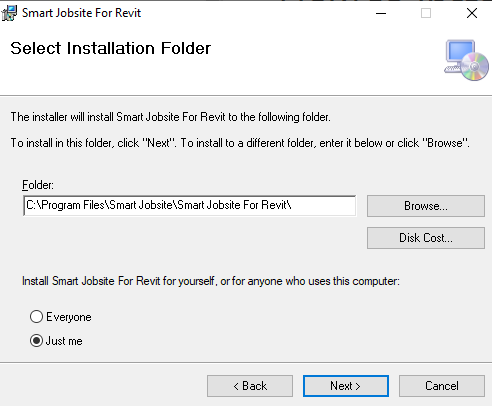
Select the installation path and click on next
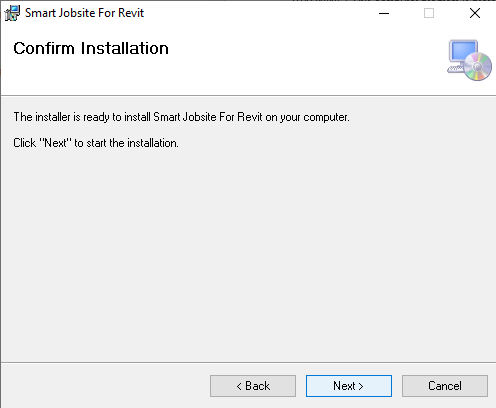
Confirm the installation by clicking on Next. If a pop-up window asks for validation, click Yes.
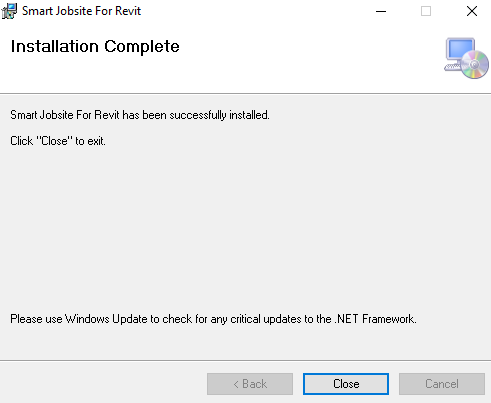
The installation is complete you can click on Close
Smart Jobsite account : Login / Signup / Reset password
Create a Smart Jobsite account from the Revit Add-on
How to create a Smart Jobsite account from the Revit Add-on ?
Your Smart Jobsite account can be use to connect to the website, the mobile app and the Revit add-on.
If you already signup on the website or the mobile app you don't need to create a new account
You first have to install the Smart Jobsite For Revit Add-on.
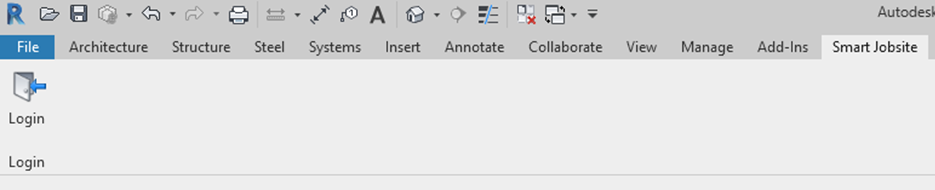
Then From revit you need to open a project.
You will have access to the "Smart Jobsite" tab.
Click on the "Login" button.
The following panel will open
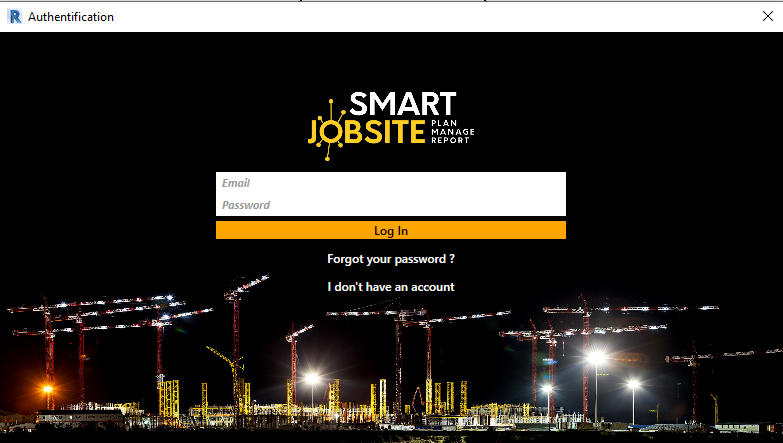
To create an account click on "I don't have an account" the following panel will open
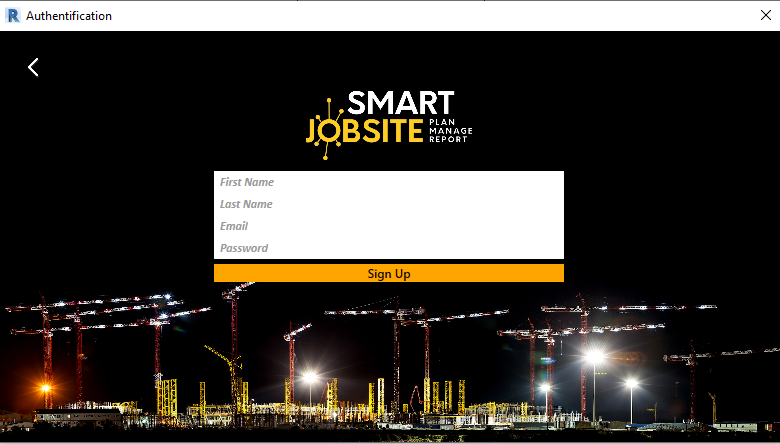
Enter your "First Name", "Last Name", "Email", "Password" and click on "Sign Up"
Log in to the Smart Jobsite For Revit Add-on
How to log in to the Smart Jobsite for Revit Add-on ?
Your Smart Jobsite account can be use to connect to the website, the mobile app and the Revit add-on.
If you already signup on the website or the mobile app you don't need to create a new account
You first have to install the Smart Jobsite For Revit Add-on.
Then From revit you need to open a project.
You will have access to the "Smart Jobsite" tab.
Click on the "Login" button.
The following panel will open
To log in enter your email and password and click on "Log In"
Reset your Smart Jobsite password from the Revit Add-on
How to log in to the Smart Jobsite for Revit Add-on ?
Your Smart Jobsite account can be use to connect to the website, the mobile app and the Revit add-on.
If you already signup on the website or the mobile app you don't need to create a new account
You first have to install the Smart Jobsite For Revit Add-on.
Then From revit you need to open a project.
You will have access to the "Smart Jobsite" tab.
Click on the "Login" button.
The following panel will open
To reset your password click on "Forgot you password" the following panel will open
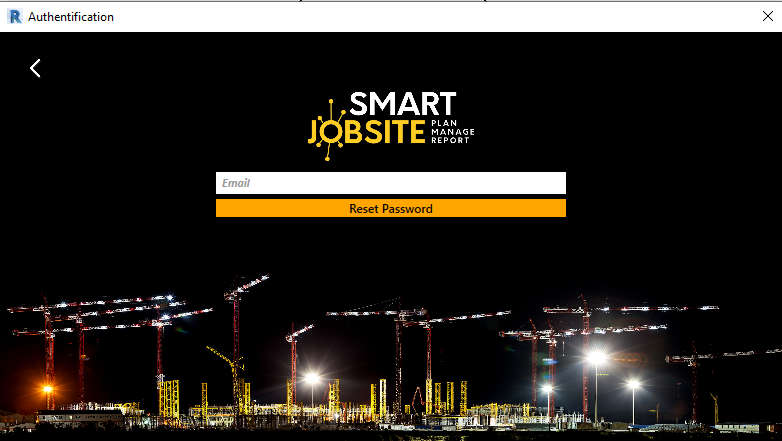
Enter your "Email" and click on "Reset Password". An email will be send to you with a process to reset your password from the Smart Jobsite website.
General project setup : Best praticies
The goal of this chapter is to define the best praticies for the generals settings of your project
Project location
Project location
Smart Jobsite uses gps coordinates to position the building, machines, areas, ...
That's why it is very important to define the location of your project before you start using Smart Jobsite.
Revit Location
Under the "Manage" tab you can click on "Location"
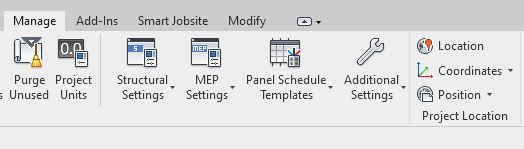
The following panel will open
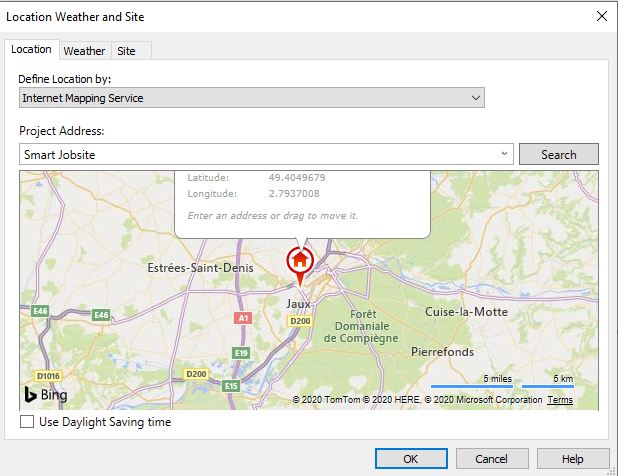
You can position you jobsite using an adress or GPS coordinates.
Project base point and survey point
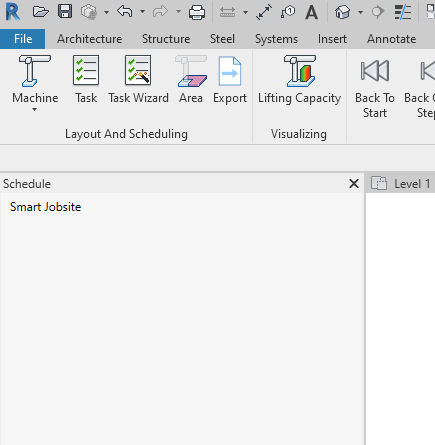
Revit give you the opportunity to setup two points to position your project. You can edit theses points with Smart Jobsite. To do this click on the Smart Jobsite Tab

You will have acces to the Schedule Panel
You can "right click" on you project name and click on "Edit project"

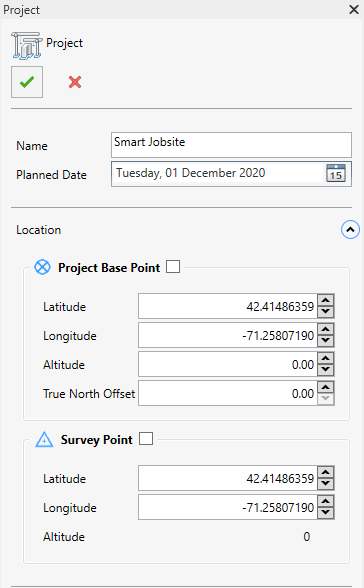
You will acces to the project settings. Under Location you can enable the project base point and Survey point so you can seethem on the 3D view.
You can also change the coordinates
Warning
SmartJobsite will use the project base point as default location for the cranes. If your points are too far away from your building when you will instantiate a crane, you won't be able to see it.
Setup the working hours
How to setup the jobsite working hours?
Smart Jobsite does not create tasks using a schedule. We create a sequence of tasks and the dates of each task are calculated according to different parameters such as the working hours of the construction site, the weather or delivery conditions etc... That's why it's important to clearly define the working hours of the construction site.
You can edit the working hours by clicking on the Smart Jobsite Tab
You will have acces to the Schedule Panel
You can "right click" on you project name and click on "Edit project"
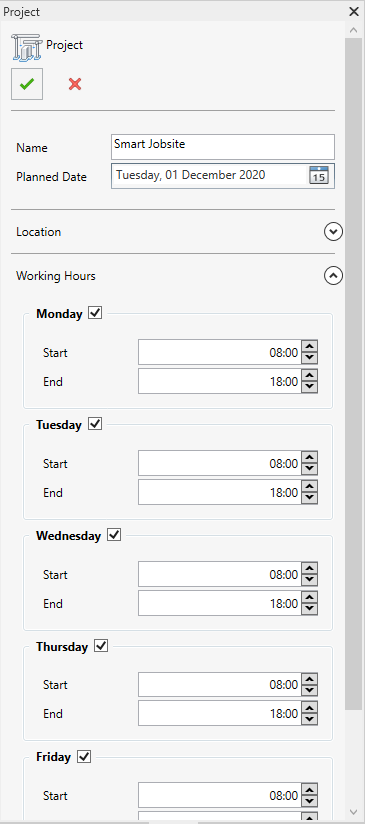
You will acces to the project settings. Under "Working Hours" you can setup the working days andhours for your jobsite.
Setup layout and user interface
How to manage Smart Jobsite For Revit UI?
The Smart Jobsite For Revit Add-on add a new tab on you Revit interface
When you click on a button a panel will open. You can drag and drop the panel to locate it where you want. We advise you to pin the Smart Jobsite Panel on the left, on the Project browser Panel as follow
Layout and scheduling
Machine
How to manage machines with Smart Jobsite For Revit?
-
Create a crane
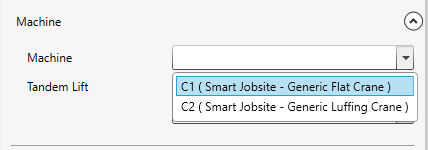
On the Smart Jobsite Tab click on the "Machine" drop down

You can choose between 4 types of machines, Flat crane, Luffing crane, mobile crane and Crawler crane
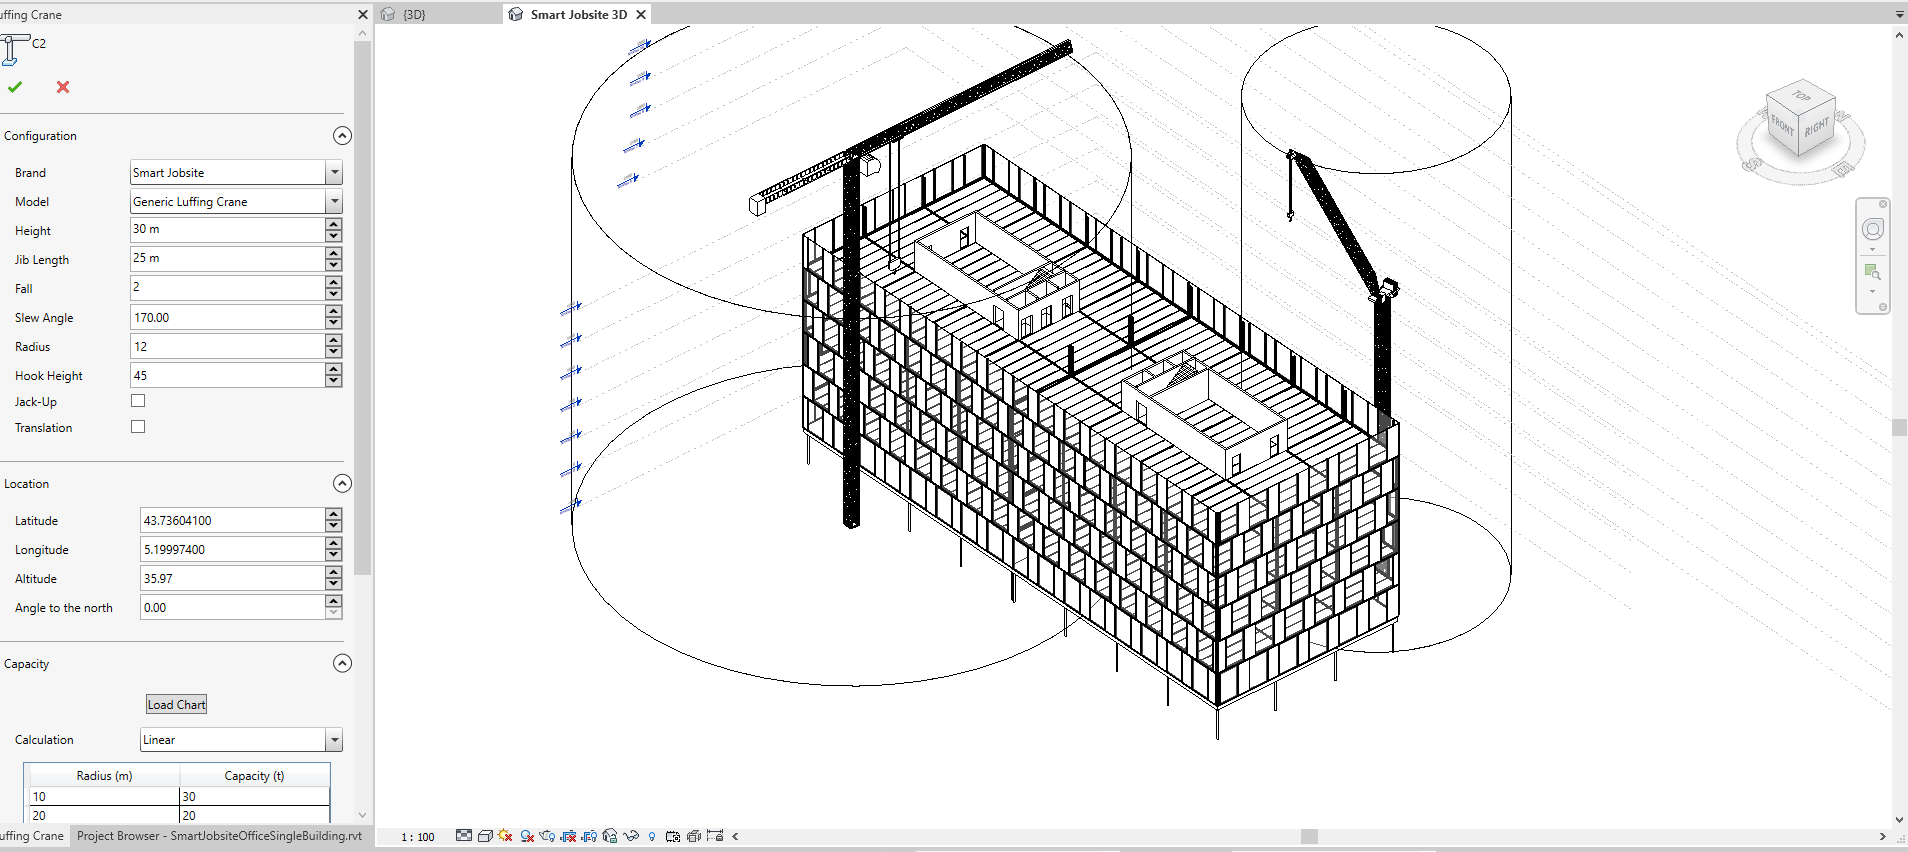
If you click on a crane type you will acces the following panel
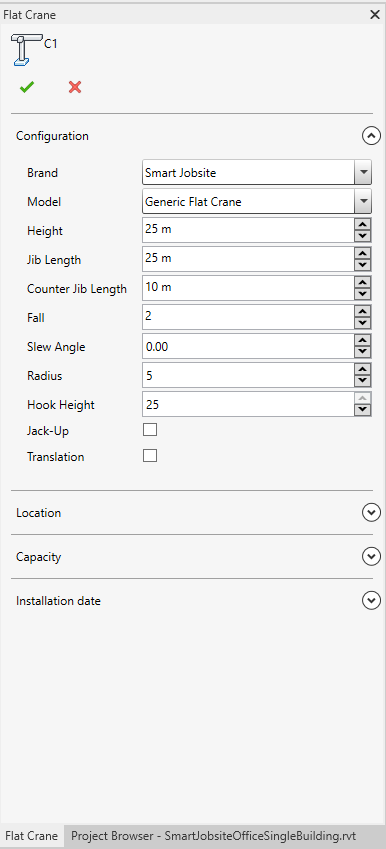
Under configuration you can manage :
- The Brand and Model of the crane, you have acces to a huge database of cranes.
- The crane geometry : height, length, counter jib length, number of fall
- The crane position : slew angle, radius, hook height.
The configurations changes will be visible on the 3D view
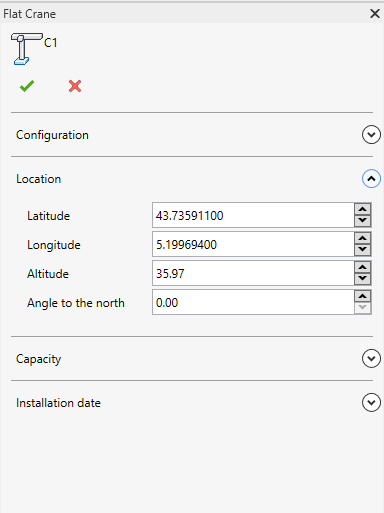
Under Location you can change the location of you crane using GPS coordinates. You will see the changes on the 3D view
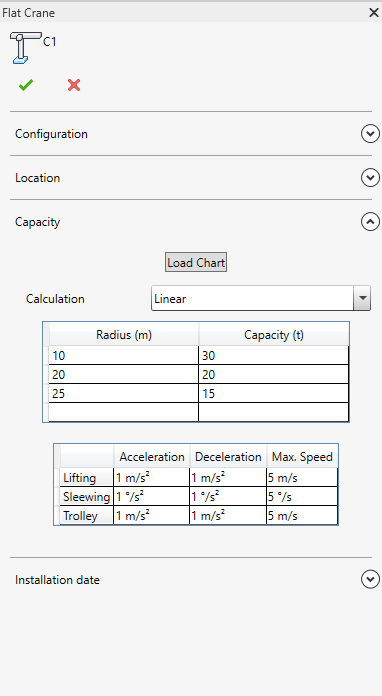
Under Capacity you can manage your load chart.
If you click on the "Load Chart" button you will have acces to the load chart have the crane you choose on the configuration part (Brand and model ).

Thanks to this you can enter the right value on the load chart table

You can change the calculation method.
If you choose Linear we will consider that the weight is linear between two points
If you choose step we will consider that the capacity change every step you defined on the table
The load chart data will be used to calculate the lifting capacity
Under Installation date you can manage the installation date of you crane
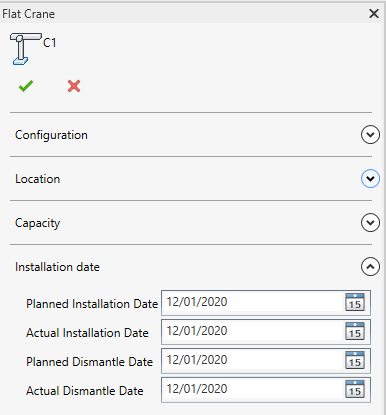
The dates you setup will be use to define the schedule
You can add as many cranes as you want and try different jobsite configuration
Task
How to create a task with Smart Jobsite For Revit
Under the Smart Jobsite tab you can click on the task button to create a task
You will have acces to the following panel
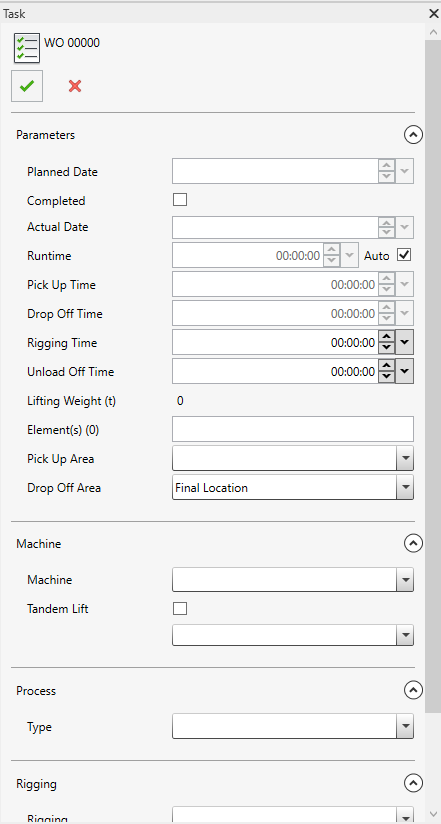
You first need to select a machine
Then you can setup the parameters
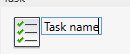
You can change the task name by click on the name
- Planned date : the planned date is calculated automatically. You can't edit it.
- Completed : you can check/unckeck it to define if the task is completed or not
- Actual date : The actual date can be changed only if the task is completed
- Runtime : if the auto claculation is checked, the runtime is calculated automatically so you cant change it. If the auto is uncheck you can define a runtime
- Auto runtime : if you enable the auto runtime calculation wsmart jobsite for revit will automatically calculate standard runtime
- Pick up time : time to pick up the load. It's automatically calculated if the auto runtime is checked.
- Drop off time : time to drop off the load. It's automatically calculated if the auto runtime is checked.
- Rigging time : time fr the rigging.
- Unload time : time to unload.
- Lifting weight : sum of the elments weight in the task.
- Elements : list of the elments of the task. You can click on element in the 3D to add/remove it to the task

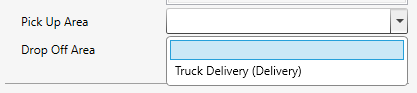
- Pickup area : you can leave blank or choose a pickup area for the task

- Drop off area : you can choose a drop off area or the final location. The final locaiton means that the element is install at his final location on the building

Under Process :
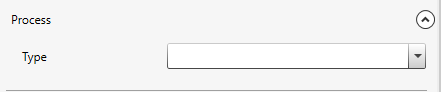
you can choose between different process types :
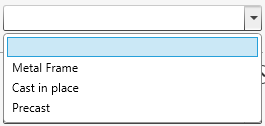
If you choose Cast in place you will have more settings :
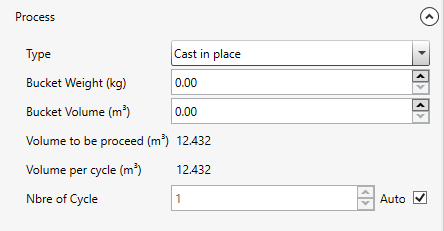
- Bucket weight : weight of the concrete bucket
- Bucket volume : volume of the conrete bucket
- Nbre of cyle : you can choose auto so the numbe rof cycle will be automatically calculated, or you can setup the wanted number of cycles
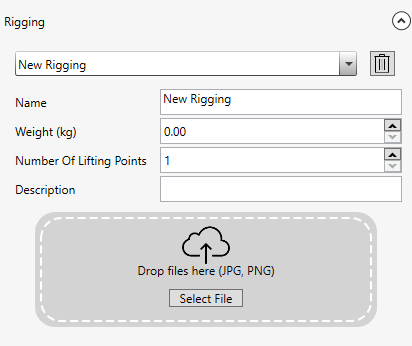
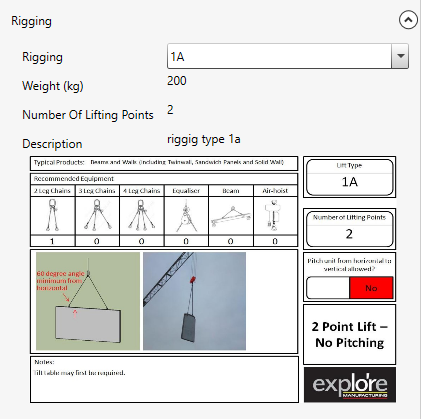
Under Rigging you can choose the rigging type. Rigging types can be created on the user database section
Once the task is fully setup you can click on  to validate it. The created task will be on you schedule
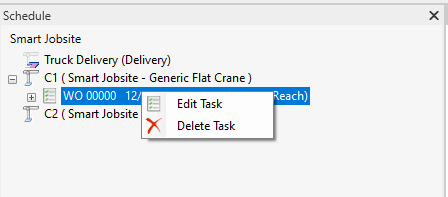
You can edit or delete the task by right click on it
Task wizard
How to use the task wizard with Smart Jobsite For Revit
The task wizard can be used to create multiple tasks at the same time. You will have acces to several filters like level or family. The best pratices are to use the filter to create task as the building will be build
Under the Smart Jobsite tab you can click on the "Task Wizard" button
You will have acces to the following panel
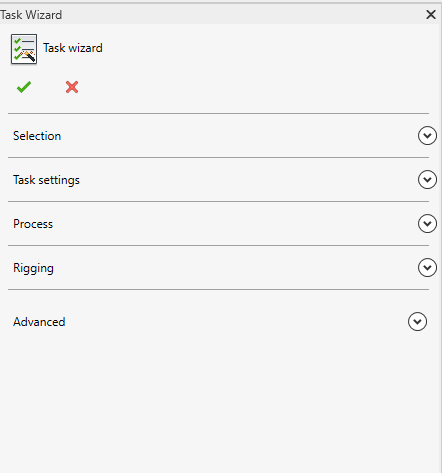
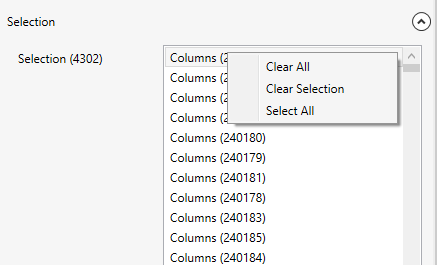
Under selection :
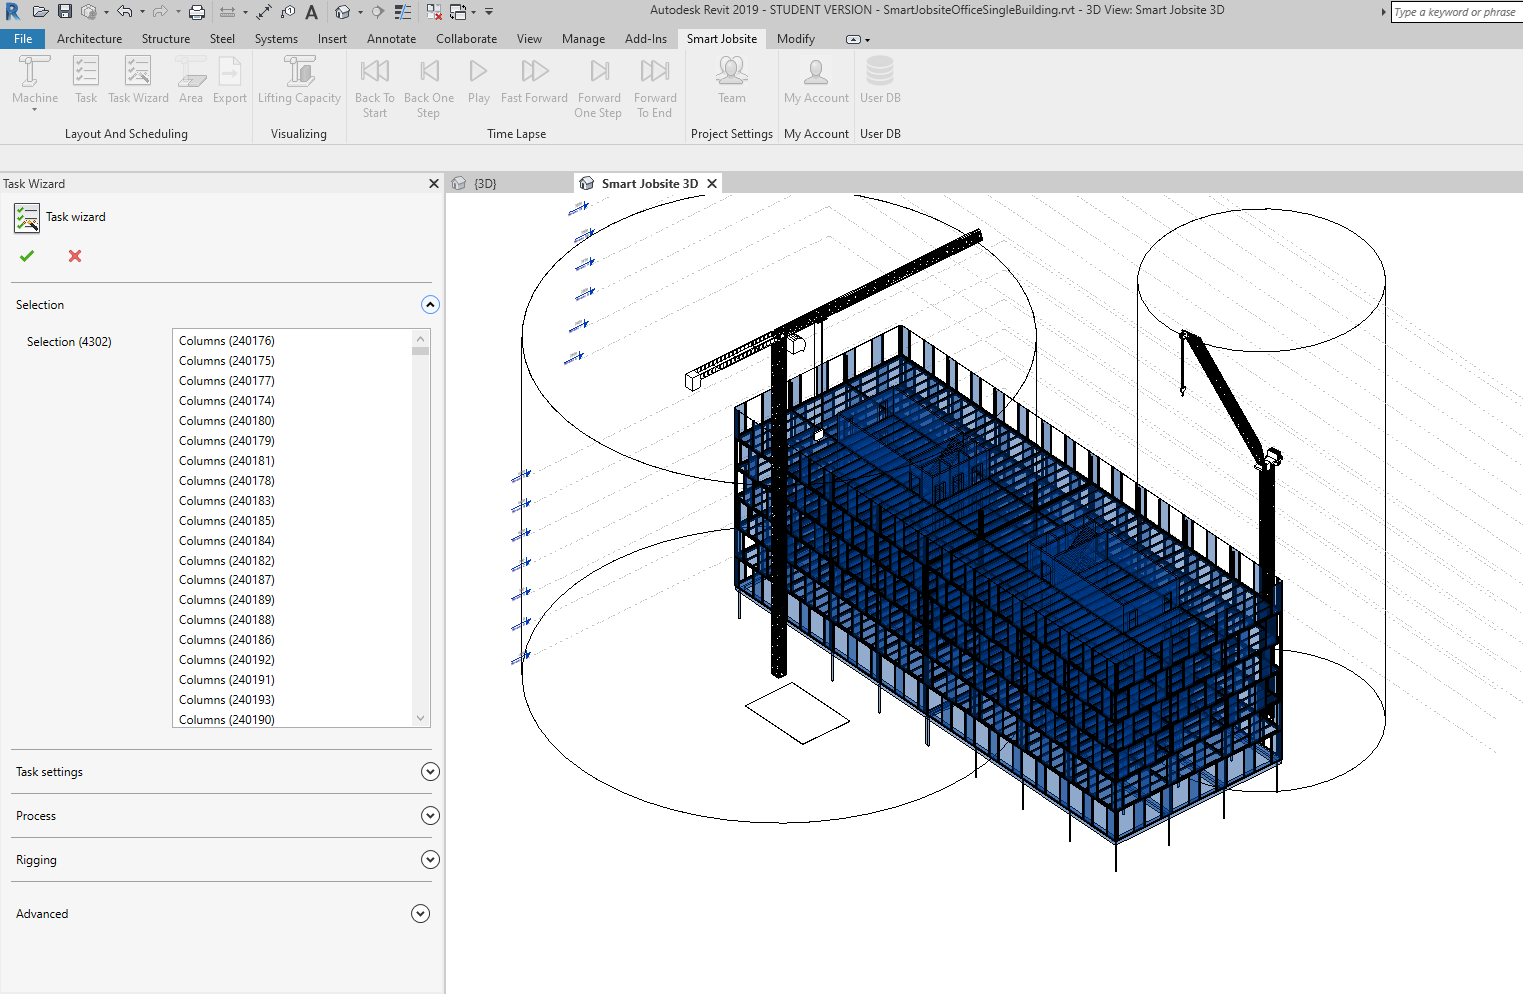
You will see the list of the selected elements. The task wizard will create a task by selected element.
You can right click on the selection to remove elements
Under task settings :
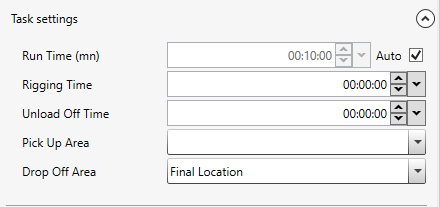
You can manage the settings of the tasks you will create. For more informations about the settings you can go to the Task documentation (click here to go to the documentation).
Under rigging :

You can manage the rigging type of the tasks you will create. For more informations about the rigging type you can go to the Task documentation (click here to go to the documentation).
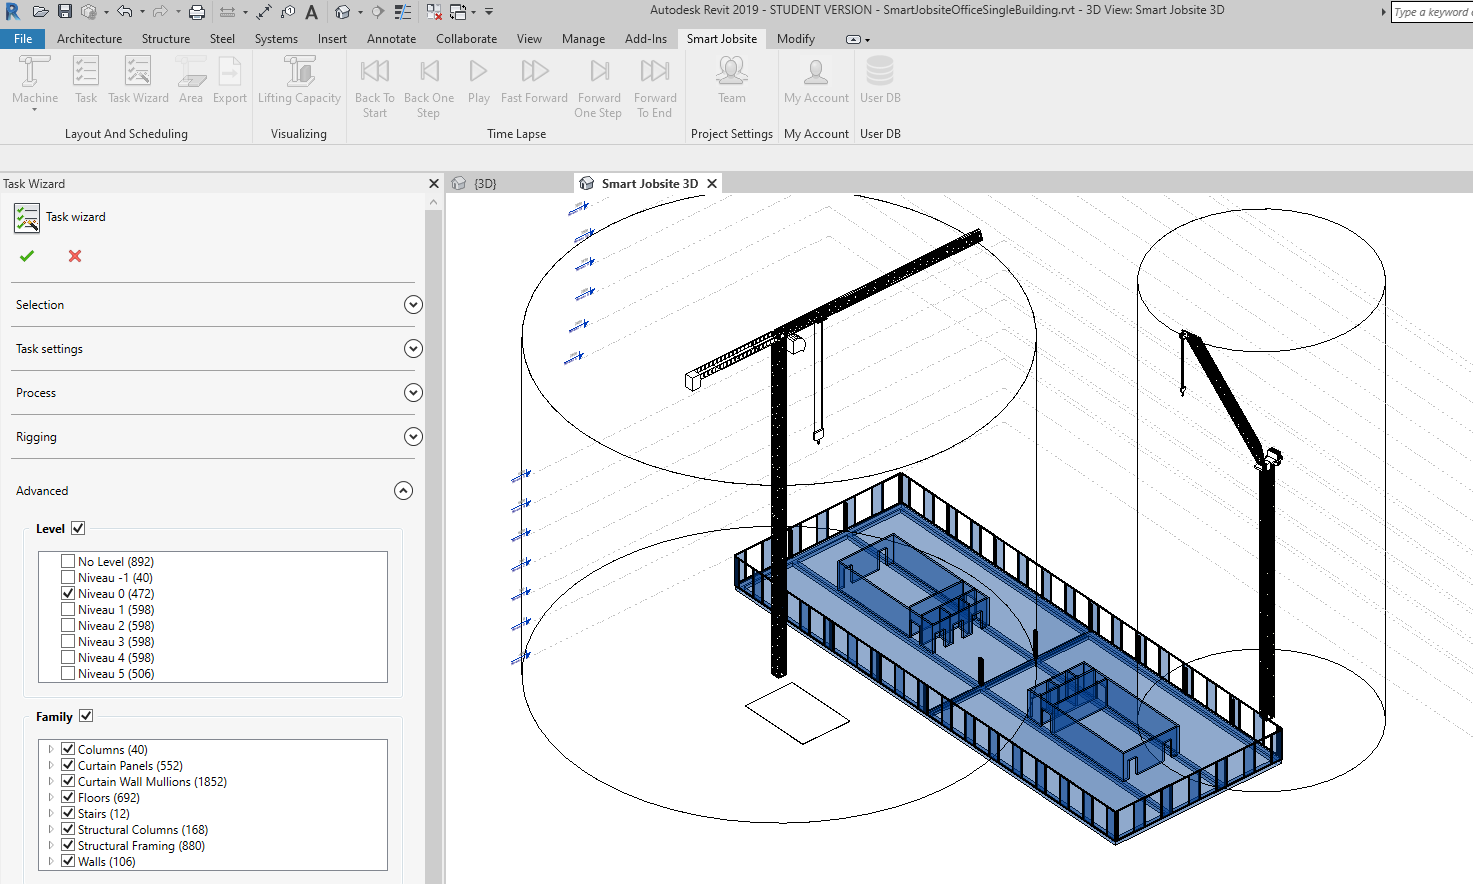
Under Advanced :

You will be able to use several filter
- Level : By checking level you will be able to filter the visible elements by level
- Family : By checking family you will be able to filter the visible elements by family
- Only unassigned elements : By checking/unchecking this option you will be able to hide/unhide the elements that has already been assigned to a task.
One everything is setup you can validate by clicking on 
You will see the created tasks on your schedule

Area
How to create areas with Smart Jobsite For Revit
Areas such as Delivery, Storage or Pickup can be created and manage thanks to Smart Jobsite. When you create task you can define the areas for the beginning and the end of the task. Smart Jobsite will then calculate the task time.
To create an are Smart Jobsite will use a floor. Once a floor is defined as an area for Smart Jobsite it will not take into account anymore as an element to lift
To create a floor you can use the Revit tools under Architecture/floor
you can draw your floor and validate
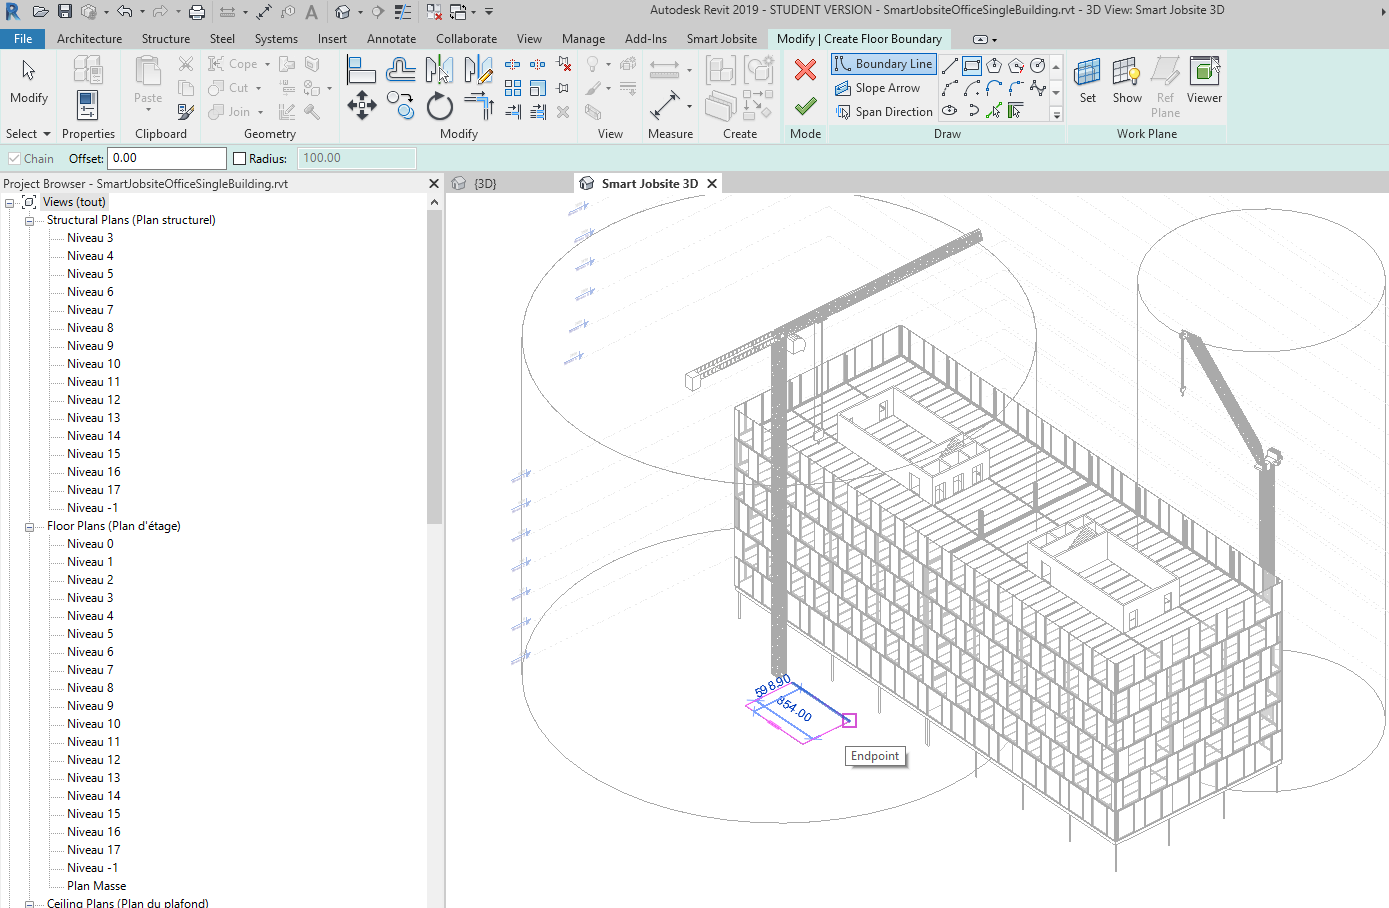
Then under the Smart Jobsite tab you can click on the Area button to create an Area
You will have acces to the following panel
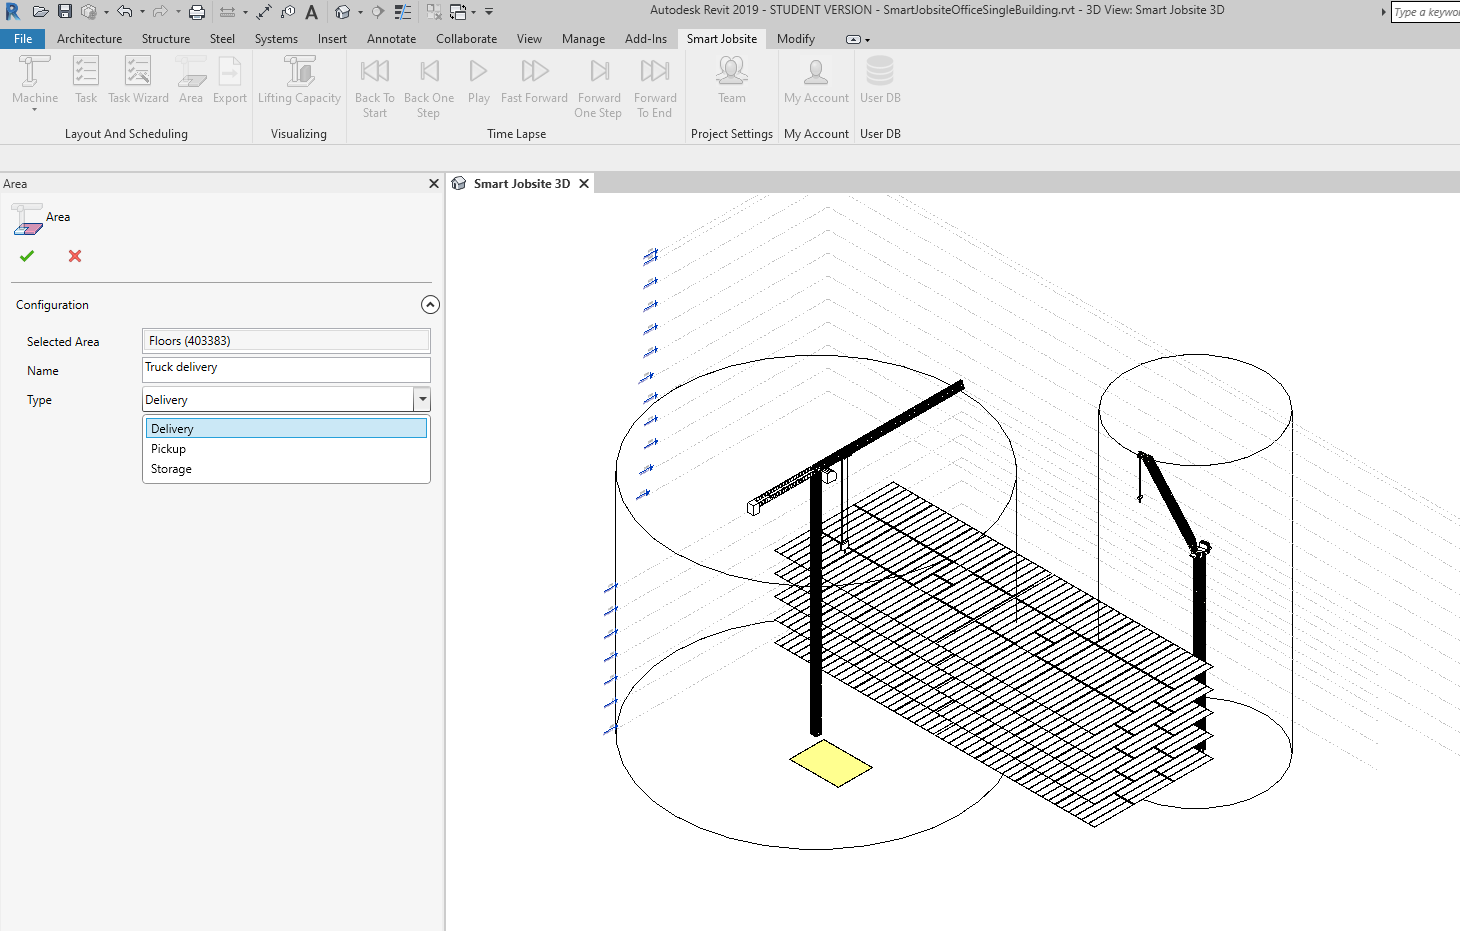
- Selected Area : you can click on a floor on the 3D to select an area
- Name : name of the area
- Type : Type of the area
Then you can validate with 
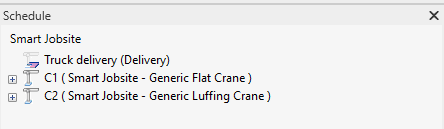
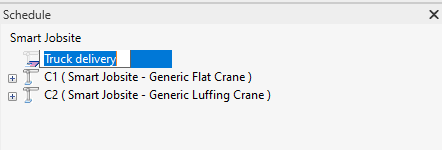
You wil see the created area on your schedule
You can change the name of the area by clicking on it
Or right click on it to edit /delete the area

Export
How to export a lifting plan with Smart Jobsite For Revit
Under the Smart Jobsite tab you can click on the export button
You will have acces to the following panel
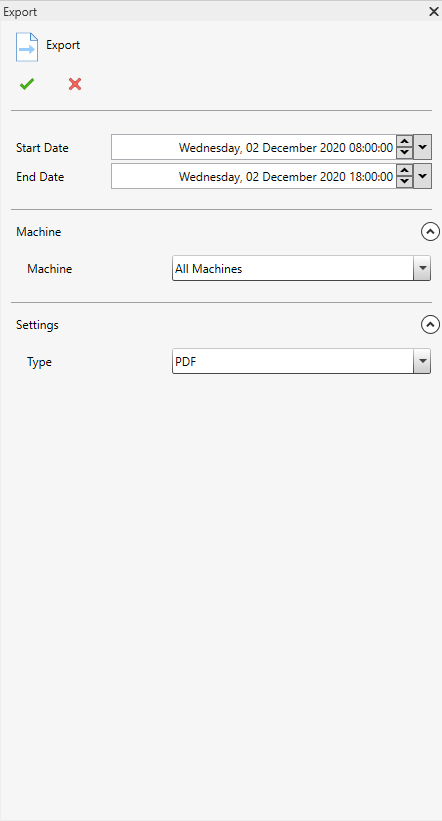
- Start date ; start date of the export
- End date : end date of the export
- Machine : the machine you want to export the lifting plan, you an choose one or all machines
- Type : the export format, pdf, csv or html
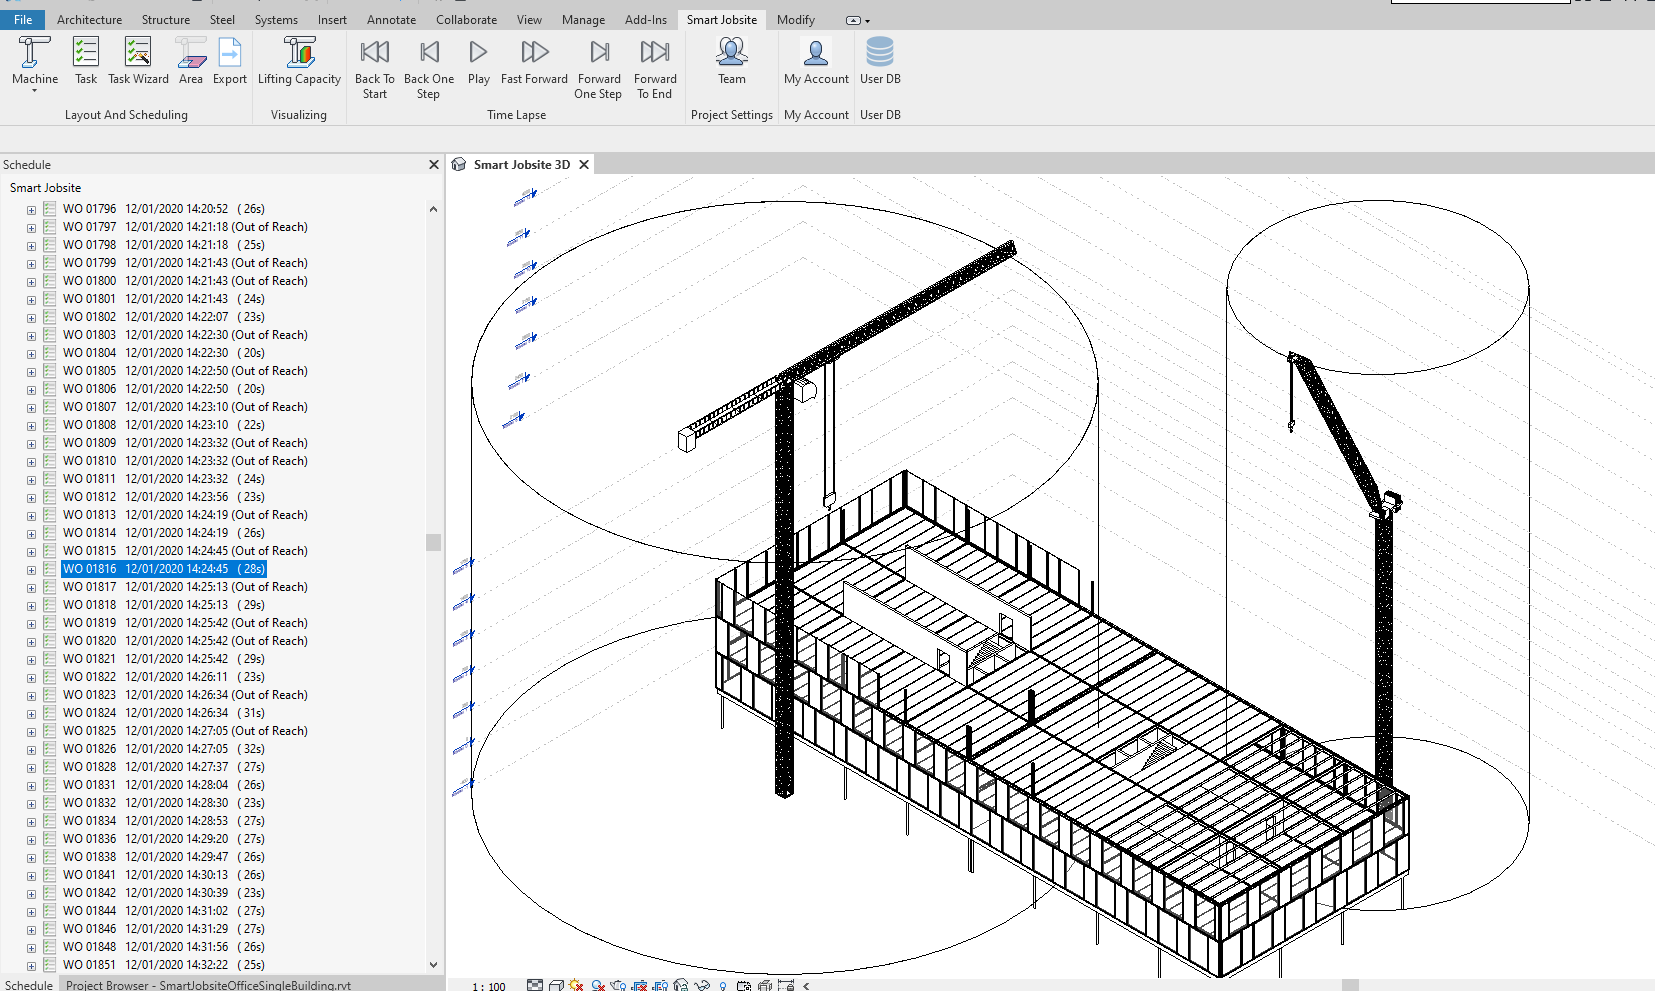
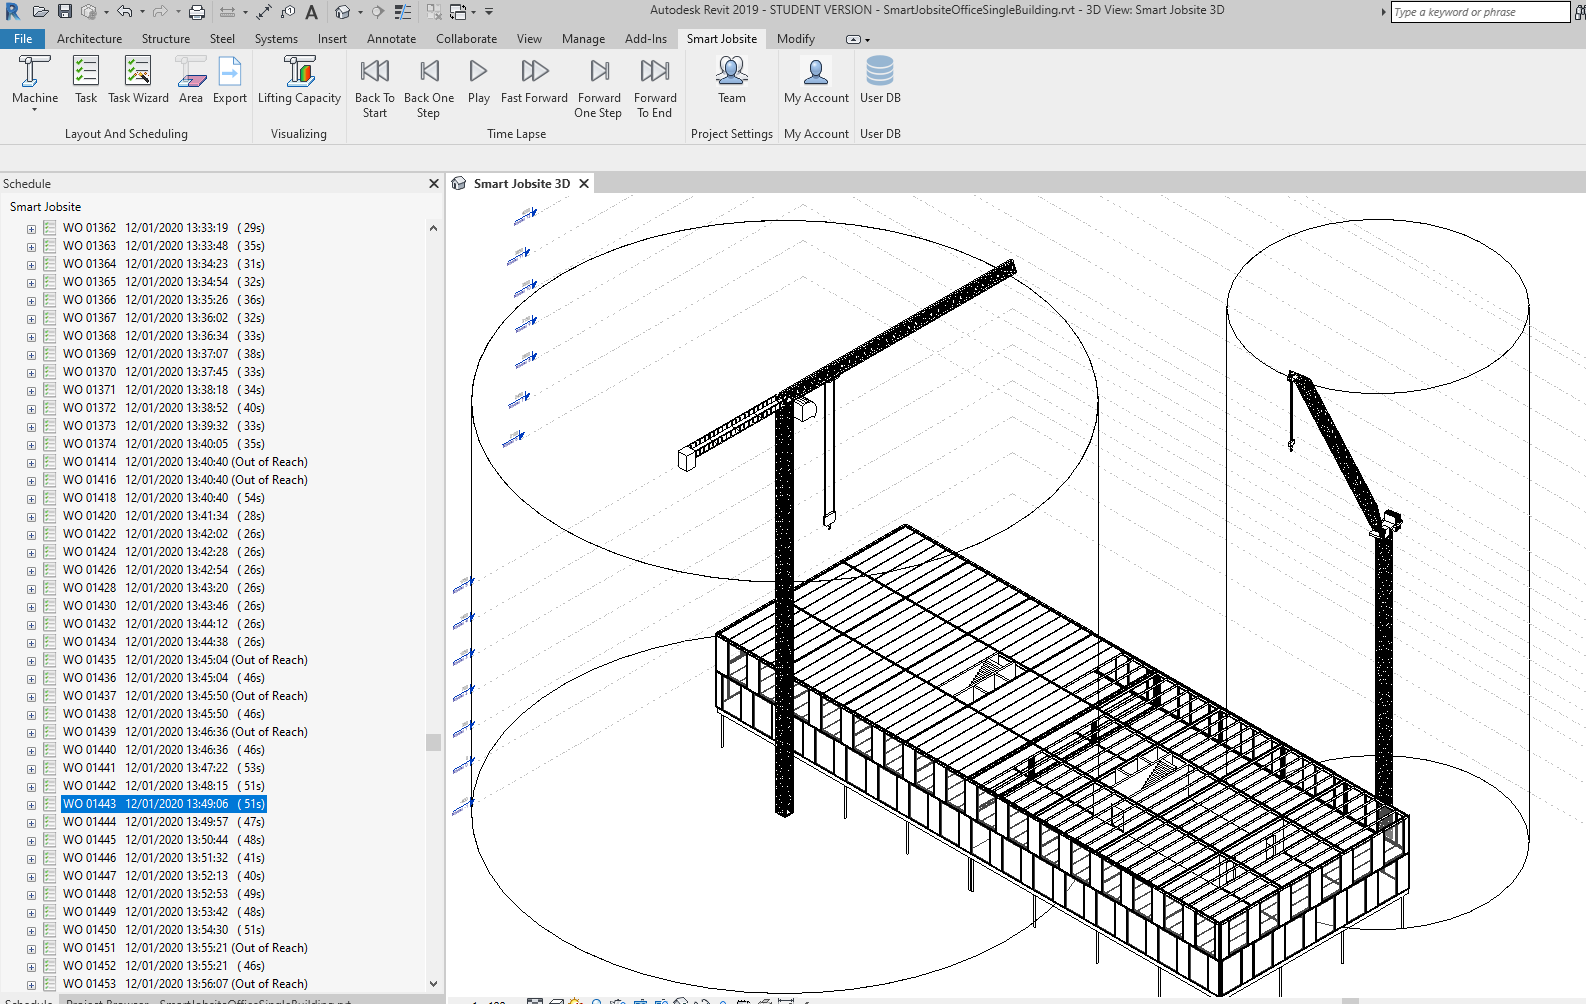
Schedule
How to use the Schedule on smart Jobsite For Revit
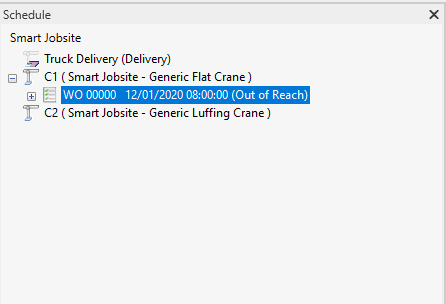
The schecule will allow you to manage you lifting plan. You can manage everything from this treeview : project, cranes,area, tasks, elemets. to edit something you can right click on it
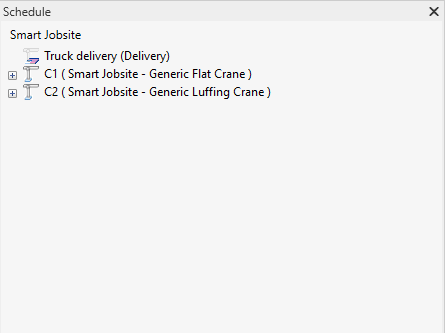
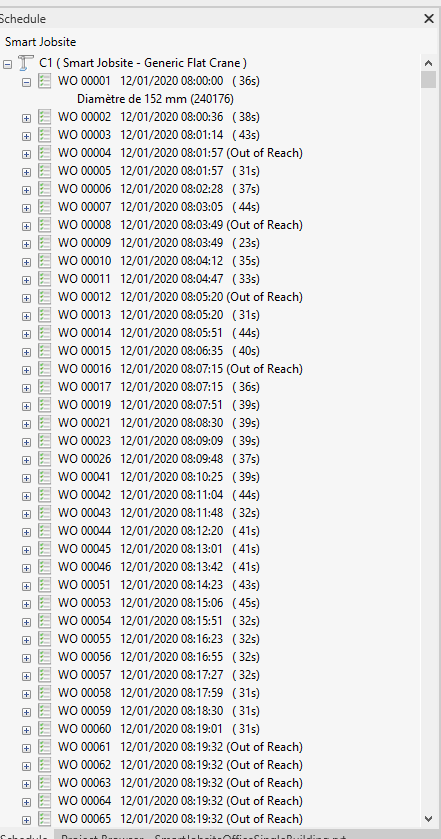
On the schedule you can expand cranes to see tasks and tasks to see elements
The schecule date will be automatically calculated with the data you setup such has crane installation date, load chart, cranes engines properties, ...
On the schedule you can see if some tasks areover capacity or not reachable
You can use drag and drop to manage you lifting plan
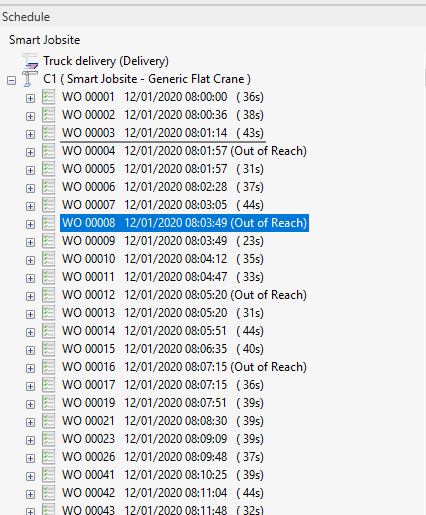
You can see the buildingprogress by clicking on a task
Visualizing
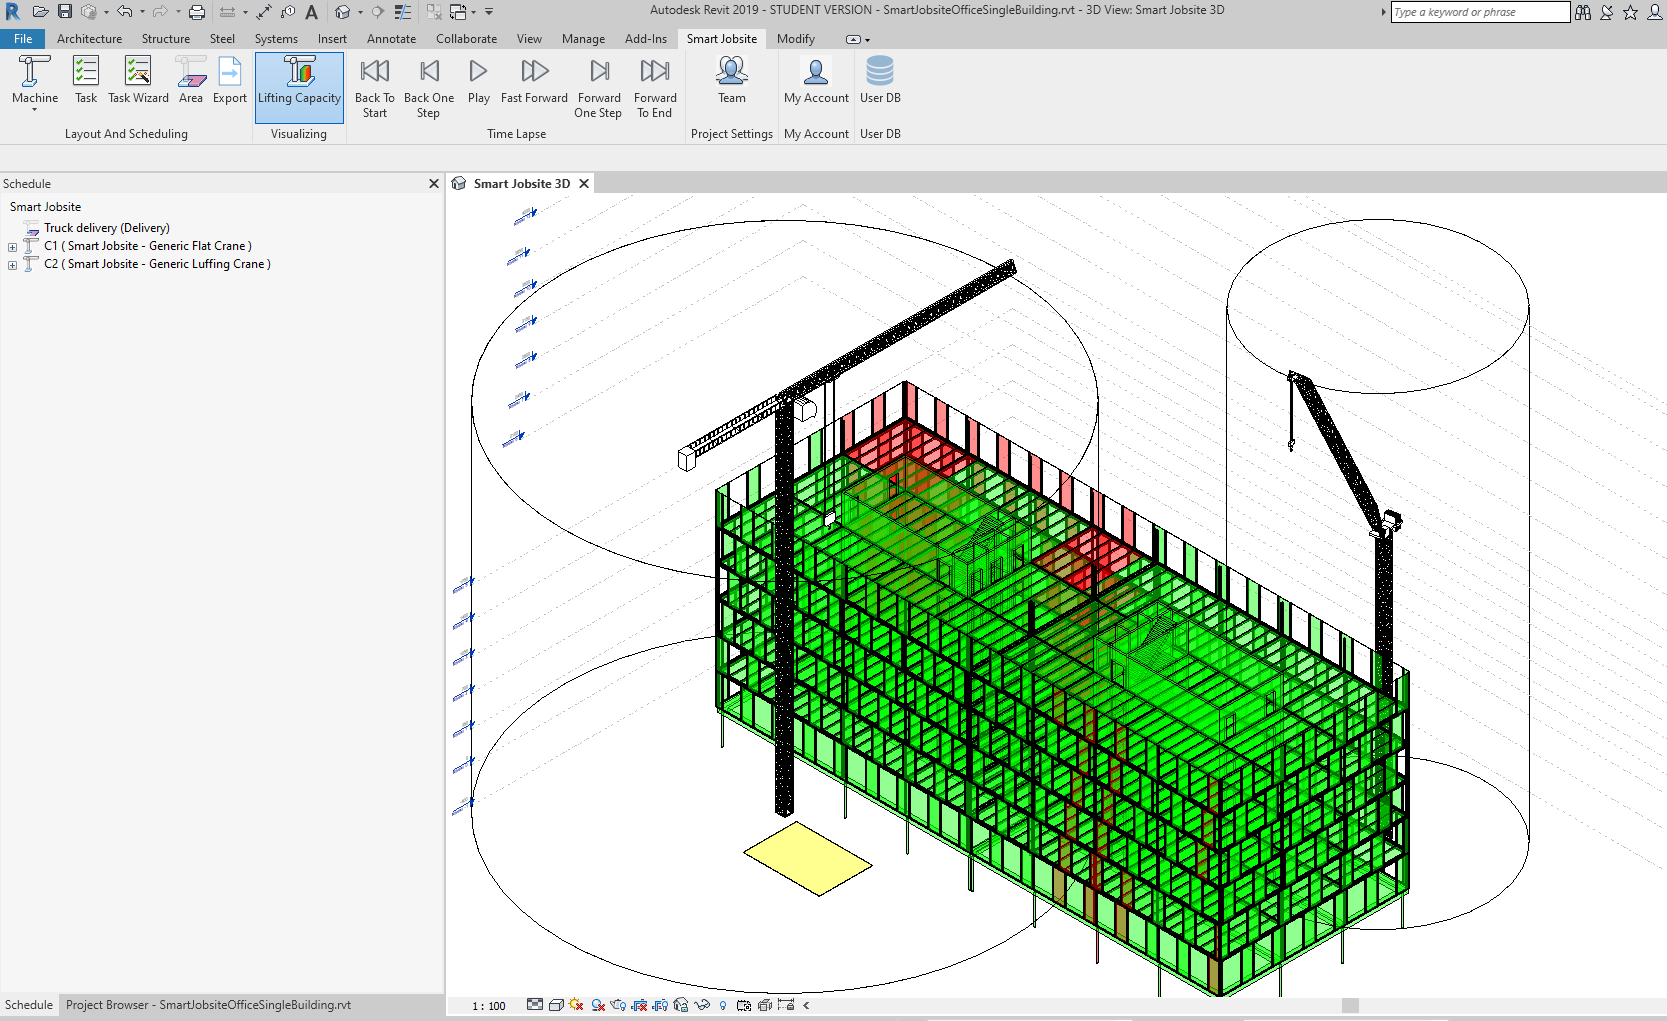
Lifting capacity
How to use the lifting capacity feature
The lifting capacity will use the load chart data to calculate the crane capacity for each tasks. On the 3D you will see different color level to help you to visualize the crane capacity.
Smart Jobsite need the tasks weight to do the calculation. The weight is automatically calculated when you setup material for the elements. You can also change the weight by editing the elements on the schedule panel
Under the Smart Jobsite tab you can click on the Lifting capacity to enable to feature
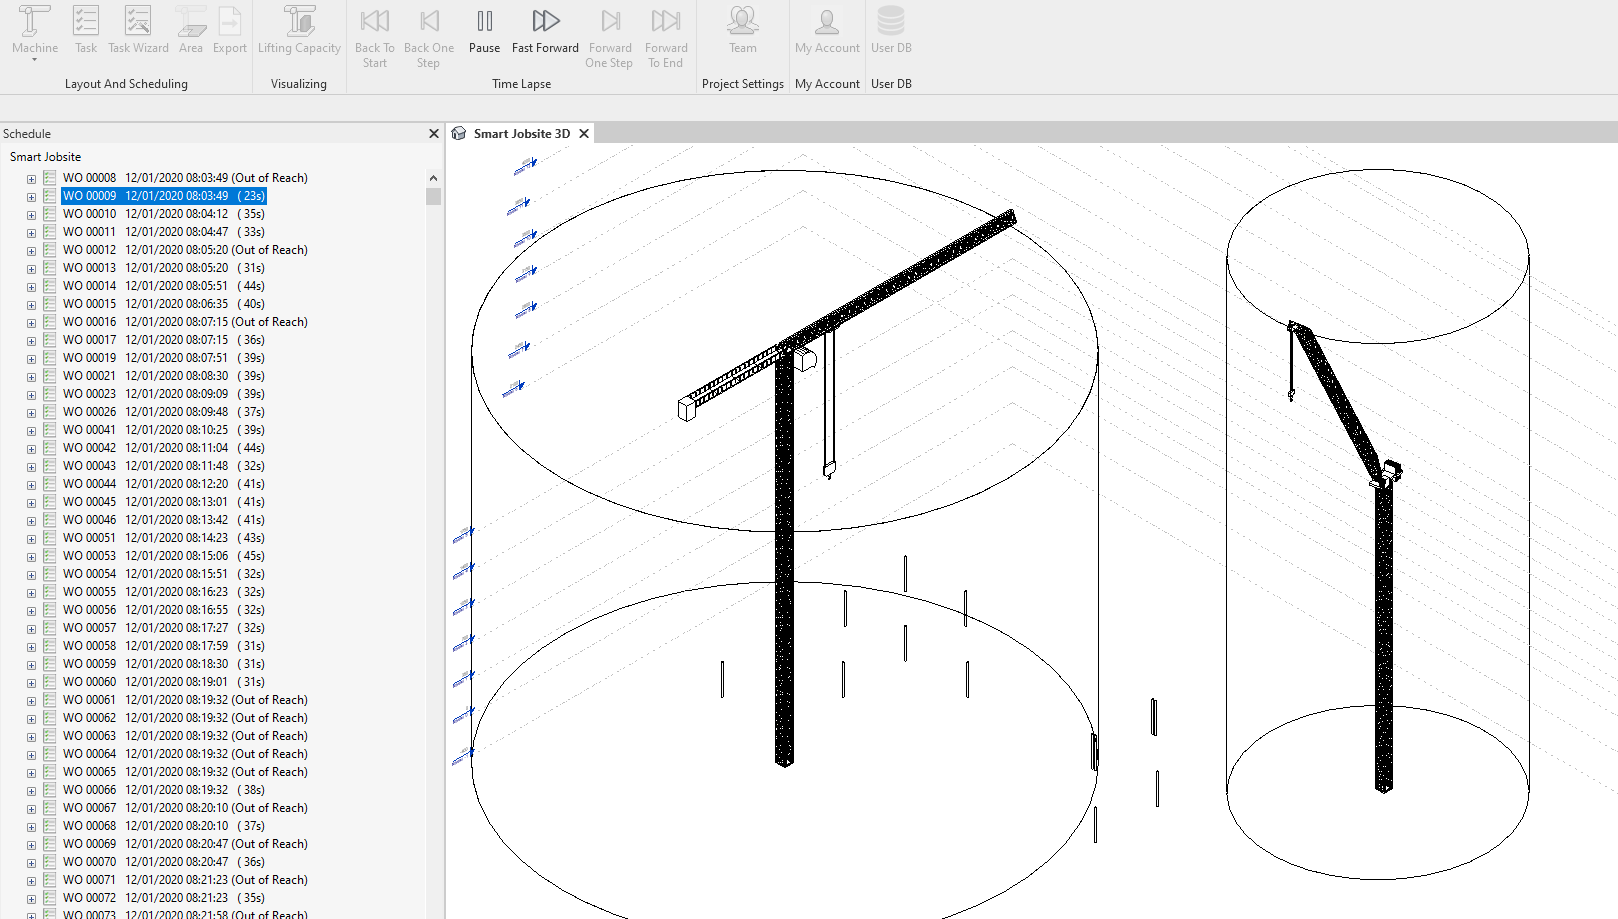
Time lapse
Time Lapse
How to use 4D with Smart Jobsite For Revit
Under the Smart Jobsite tab you have 6 button to manage the 4D
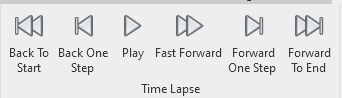
You can play or move step by step to see the time lapse of you jobsite
Project settings
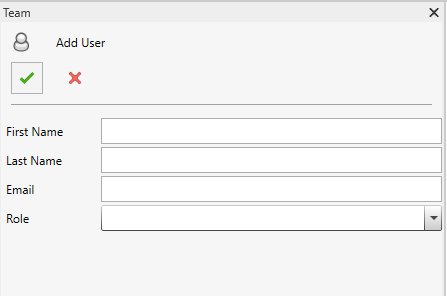
Team
How to mange user right on a jobsite
Under the Smart Jobsite tab you can click on the Team button
You will have acces to the following panel with the users list
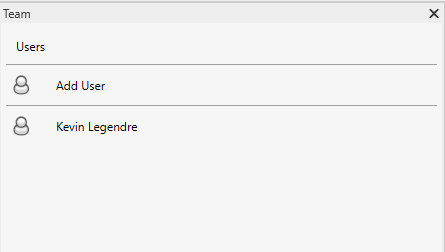
You can click on add user to invite a user to the jobsite
The invitated user will receive an email to notify him. If the user doesn't have a Smart Jobsite account, an account will be created and the user will receive the login information by email.
User Data Base
User database
How to manage the user database
The user database contains all the user informations like load charts, rigging type, ...
Under the Smart Jobsite tab you can click on the User DB button
You will have acces to the following panel

Under crane you can create/edit/delete load charts and crane engines properties.
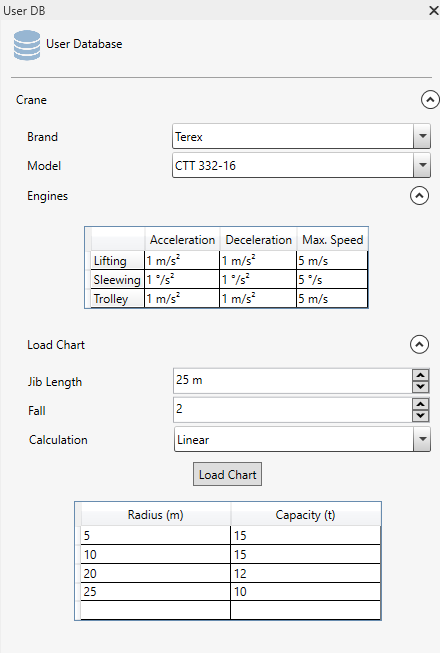
Under rigging you can create/edit/delete rigging types